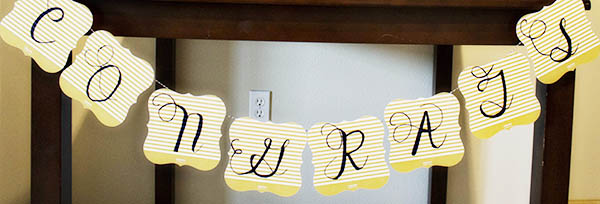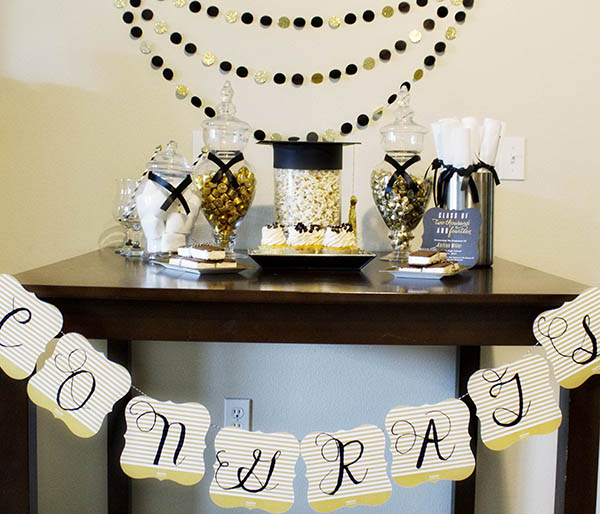
We couldn’t wait to show you how we made the hand drawn script congrats banner for our black and gold graduation party. Follow these 6 easy steps and you can have your own in no time. It’s quick, easy and really you can’t mess it up, we promise!
SUPPLIES:
- Word Document
- Favorite Font
- Printer
- Scissors
- Tiny Print Graduation Invitation
- Sharpie
- Twine
- Tape
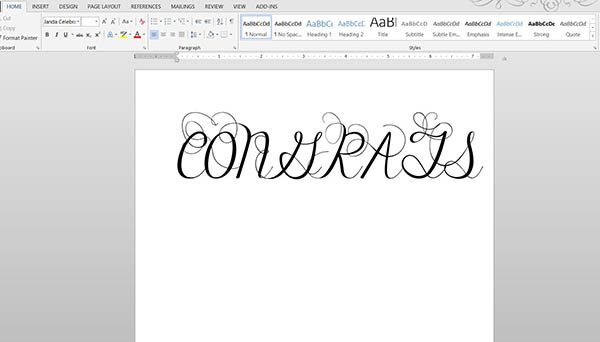
Step 1: Start with a blank word document and choose your favorite font. I went with Janda Celebration Script I downloaded for free here on Da-Font. Print out 1 letter per page and make it as big as you want. I went with 300 pt font for this project.
Step 2: Cut out the letters. TIP! You don’t have to be exact here. You are just doing to trace the outside of the letters and fill in the rest so you don’t have to cute out mittle parts of O’s or even G’s. This font had a very scripty beginning and end so I only cut one side of that as well so I wasn’t left with a tiny part of the font that was too hard to cut.
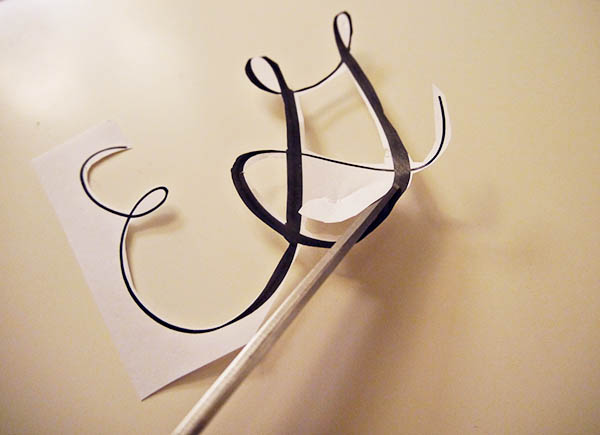
Step 3: Now you have a template! Take the back of the Tiny Prints Invitation-(We used Rich Refinement that comes with gold stripes on the back which makes for a seriously lovely look) and start tracing the outside of the cut letter. You can start with pencil or go right to sharpie it is up to you. TIP! You will be filling in the width part of the font with sharpie so you only have to do the outsides of the letter. Once you remove the template letter you can connect all of the dots too.
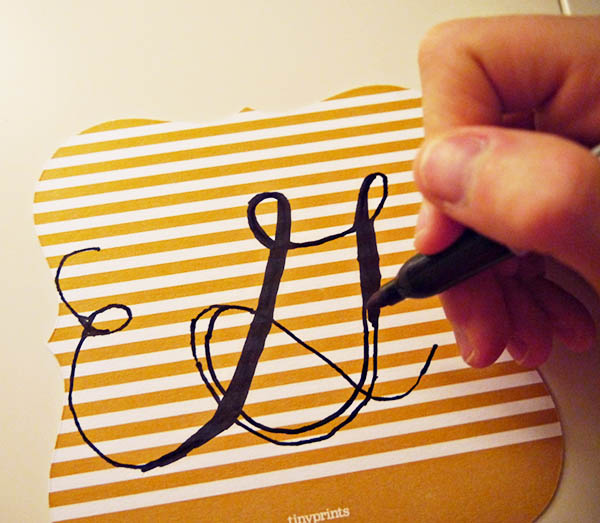
Step 4: Now fill in the letter. Make things bold where they need to be bold and script where they need to be script. It is ok if it looks messy in the beginning. Which sharpie, you can just fill in or or make lines bigger to make everything connect. What is nice about the font I used is the letter gradually got smaller or bigger in some parts which allowed me to free hand it quite easily. If I ever messed up, I would just make that part of the letter a litter bigger width wise. Quite a perfect cover up for doing it free hand I would say! The best part is the finishing letter looks almost like a replica of the print out.
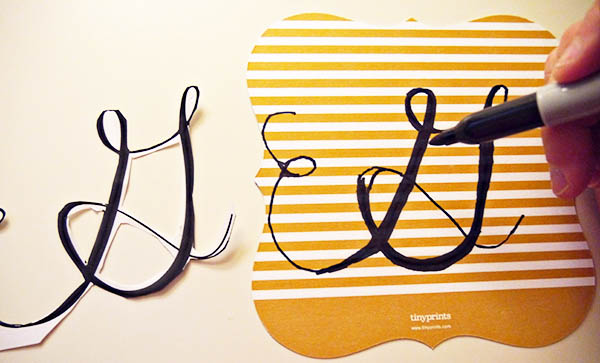
Step 4: Go letter by letter until you have all of the Congrats finished. Make sure you smooth the lines and “clean up” the letters as much as possible so they look printed. With Sharpie, it is a breeze! It will look beautiful once you are done we promise!

Step 5: Take a long piece of twine (Hint be sure to measure how much you need beforehand for the letters. Ours was about 4-5 ft.), then flip the invitations over and tape in place.
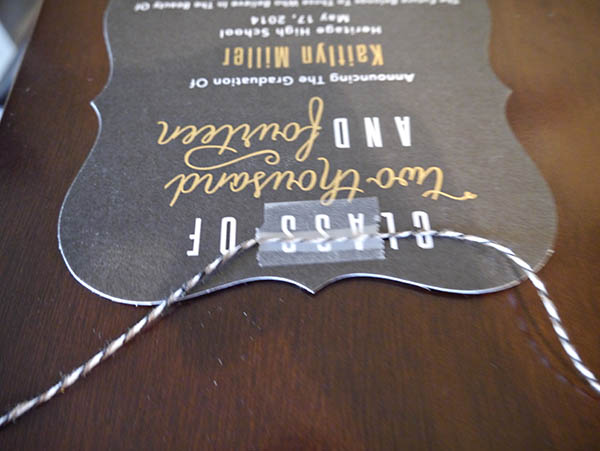
Step 6: Hang where you like and show it off. You now have a beautiful hand-drawn, script font Congrats banner for your lovely graduation party!