We have 3 lovely Boho baby gifts to DIY today and we can’t wait to show you these projects. BOHO is all the rage right now and we especially love the anything BOHO on an infant. The great news about BOHO is it is wild, free and definitely has a handmade feel to it. These Boho baby gifts are easy yet lovely in every way. They are will definitely have Mom going awe when you give them because they are just too cute! Let’s get crafting!
DIY BOHO Baby Headbands
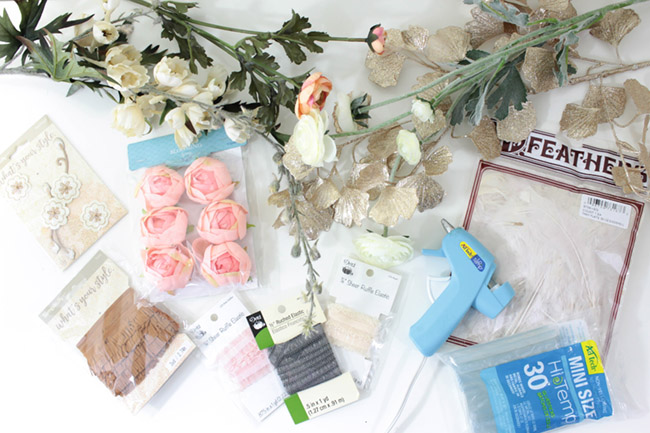
Here is what you need:
• EC 3pc Ivory Flower (available in-stores)
• EC Suede Fringe (available in-stores)
• Delphinium Spray
• Peach Ranunculus Spray
• Blooming brand Pink Rosettes
• Colors of Ruffled Elastic, Ivory, Peach & Grey
• Scissors
• Wire Cutters
• Glue Gun & Glue
• Lacy BOHO Ribbon or Ivory Felt
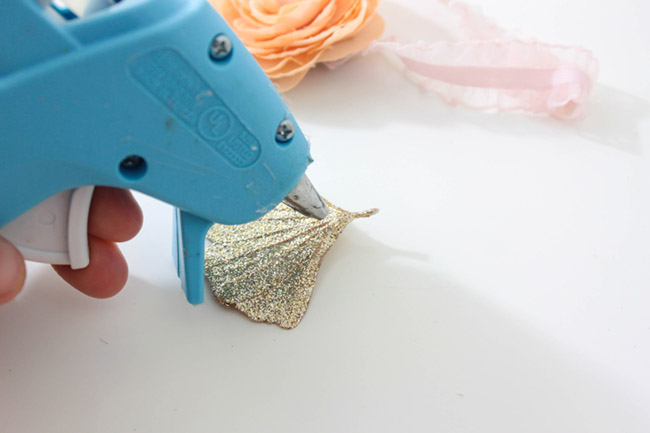
• 27” Gingko Gold Glitter Leaves
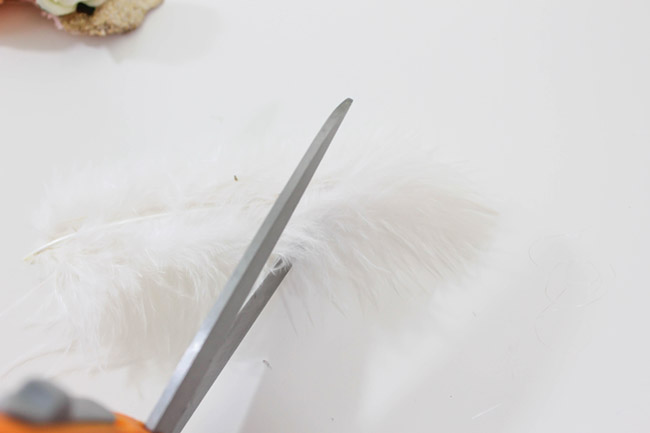
• White Feathers
Blooming BOHO Headband Instructions:

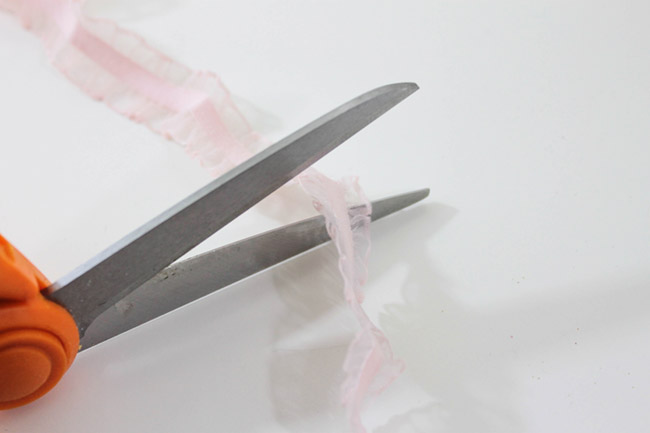
Step 1: measure out about 12 inches and cut the peach ruffled elastic.
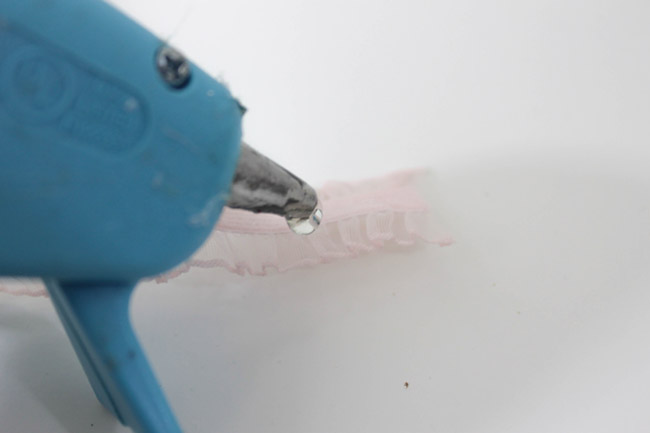
Step 2: Take a dab of hot glue and attach the ends of the peach ruffled elastic together.
Step 3: Let cool. While cooling, remove all ranunculus and delphinium blooms from stems with your wire cutters.
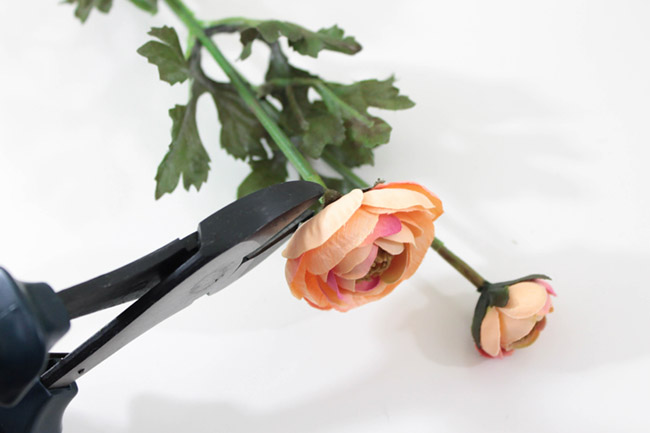
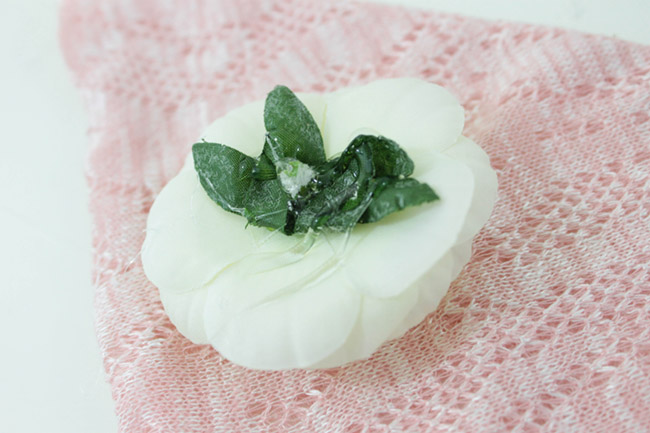
Step 4: Grab your favorite ranunculus bloom and dab with hot glue. Attach to ruffled elastic. Position bloom on the right side of the headband.
Step 5: Cut a bit of the Boho lacy ribbon ( about 1.5”) and affix it to the back of the bloom. This will help hold the bloom in place as the elastic expands and contracts.
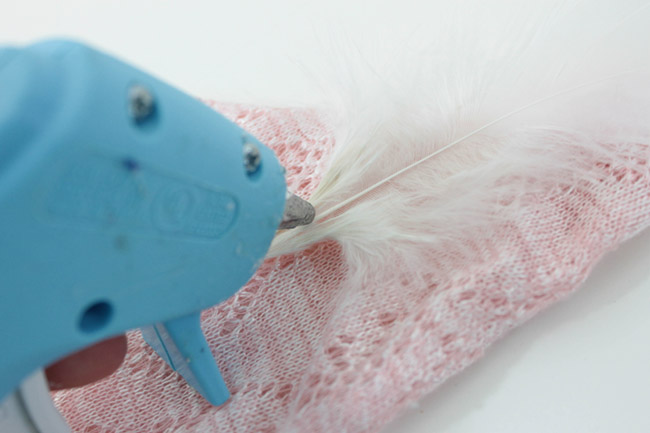
Step 6: Add in additional small blooms, feathers and glitter leaves with hot glue to create your perfect look. Feathers that are too large can be cut to the perfect size to fit your headband. There are no rules here so let your creativity flow!
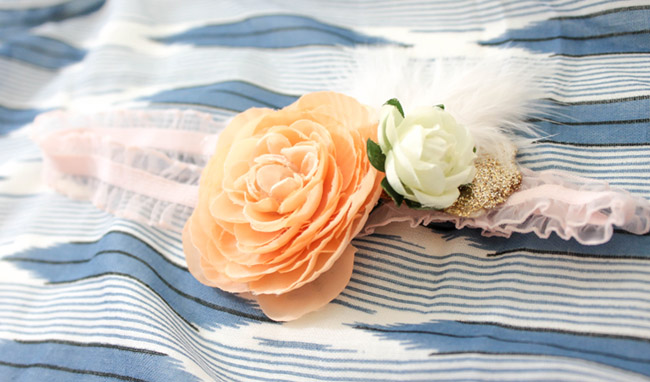
Step 7: Let dry and cool. Now you have a perfect blooming headband that makes such a darling Boho themed gift for the new little one!
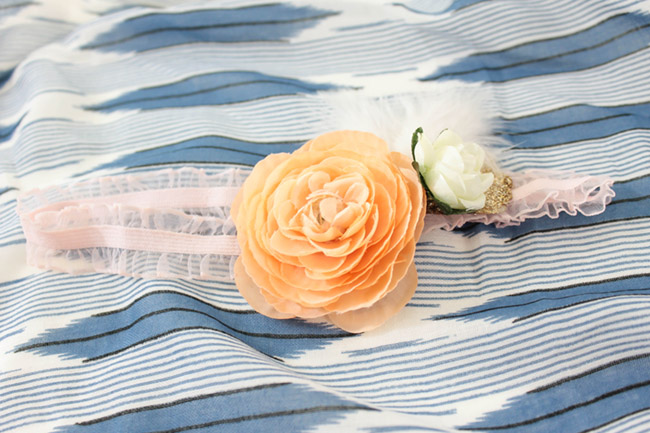
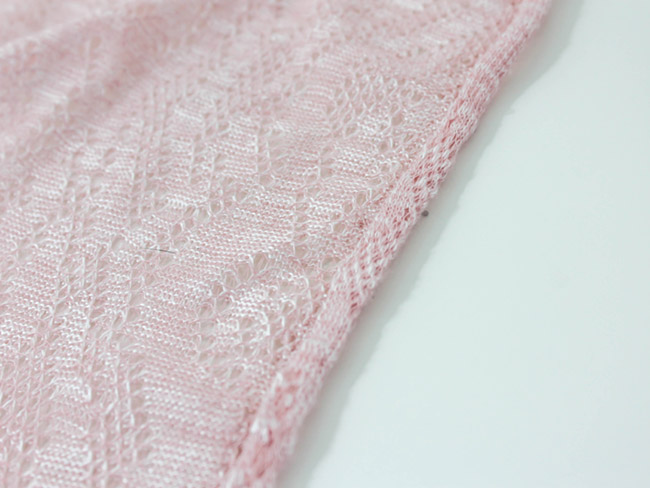
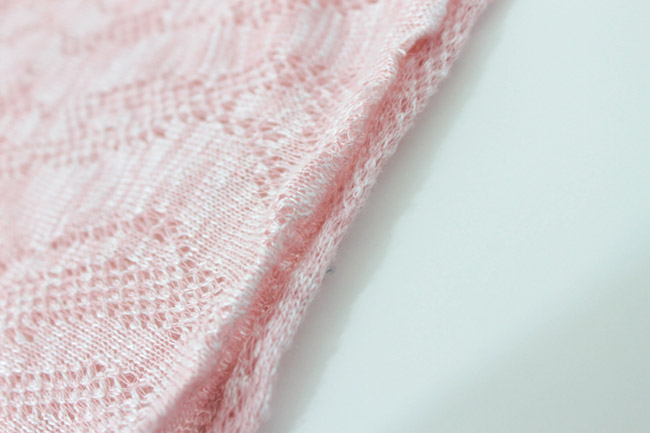
The feather and the ruffles create the perfect softness. The glitter leaf adds in that little flair.
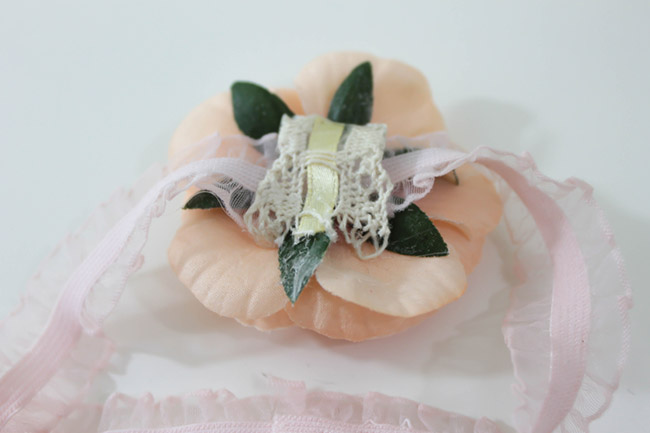
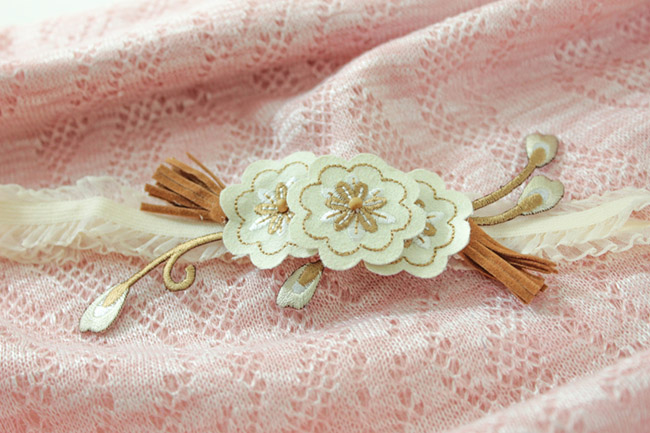
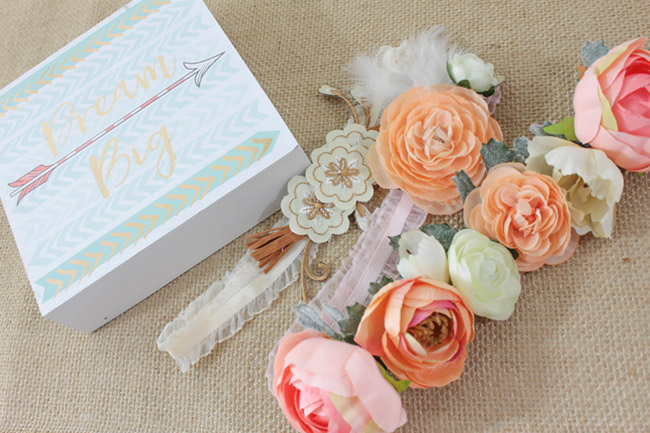
Fringe Tassel and Embroidered BOHO Baby Headband
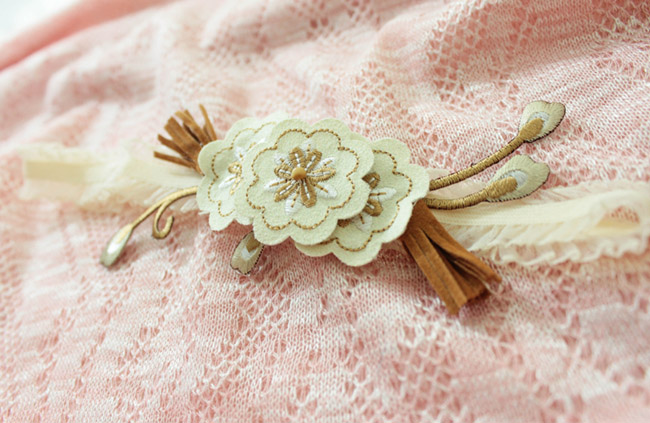

There are lots of different looks you can do for BOHO headbands following those same instructions above. This particular headband utilizes a BOHO embroidered flower set and some DIY fringe tassel to create its look.
Step 1: Follow steps 1-3 above, but grab your ivory ruffle elastic for this headband. It complements the embroidered flowers so well on this headband.
Step 2: Since the embroidered flowers are already complete in the set (awesome right?!) You can just secure these on the elastic with hot glue.
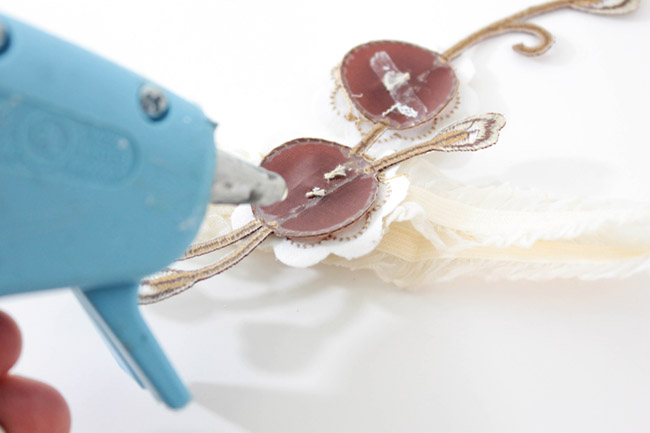
Step 3: Add in the lace behind the embroidered flowers to secure to the elastic.
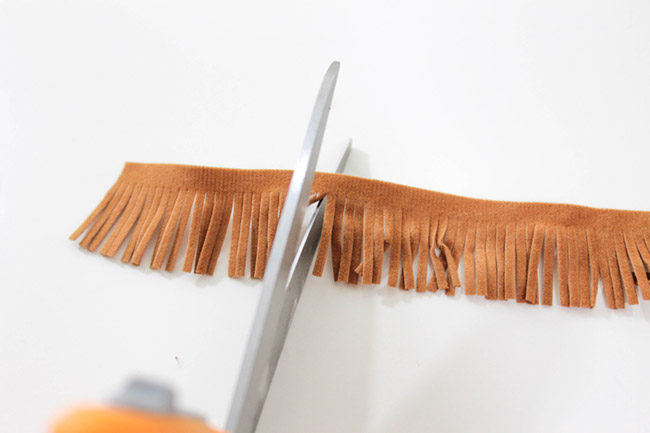
Step 4: Get your suede fringe and measure and cut about 2” of it.
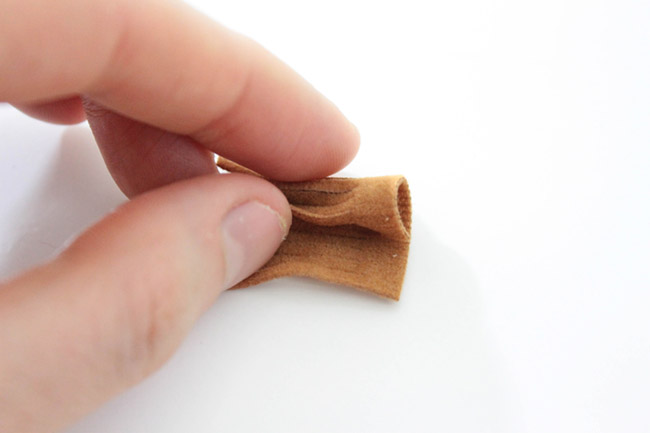
Step 5: Roll one side inward and secure with hot glue. Continue to roll until the end is met and secure the end with hot glue.
Step 6: Secure the fringe tassel behind the embroidery flower decal. Placement is up to you and you can use as many as you would like. They are cute no matter where you put them! We like them placed on the left top and bottom right of the embroidered flowers.
Step 7: Glue an extra embroidered flower that comes in the set to the middle of the decal. Let dry.
Now you have a fun suede fringe and embroidered flower headband that is too darling! It’s a more rustic BOHO look than the blooming one above, but still lovely!
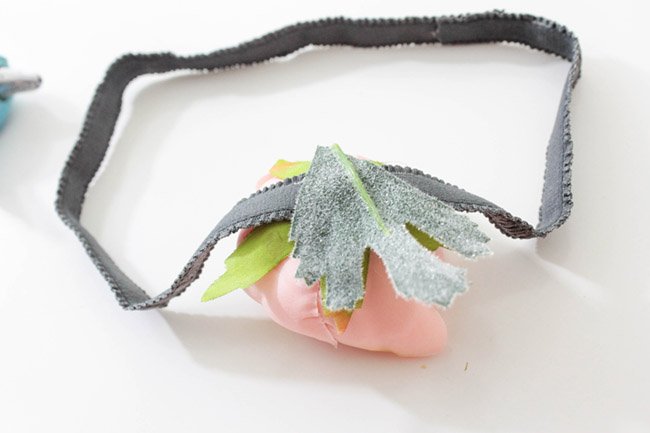
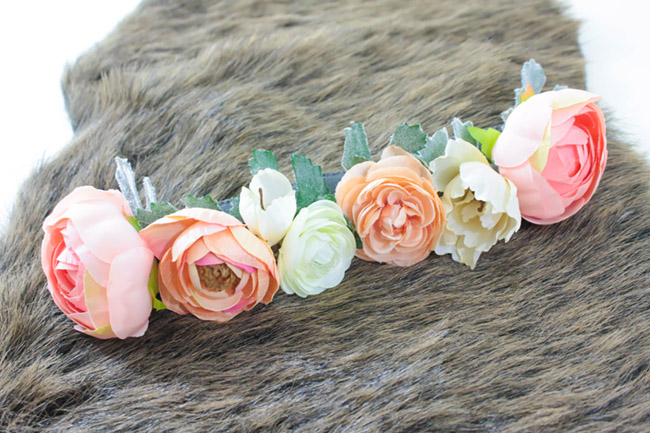
Floral BOHO baby crown/headband
Floral crowns are all the rage with BOHO looks and they are so easy to make! Grab your gray elastic for this look and the floral blooms that you snipped for the first headband and we are ready to craft.
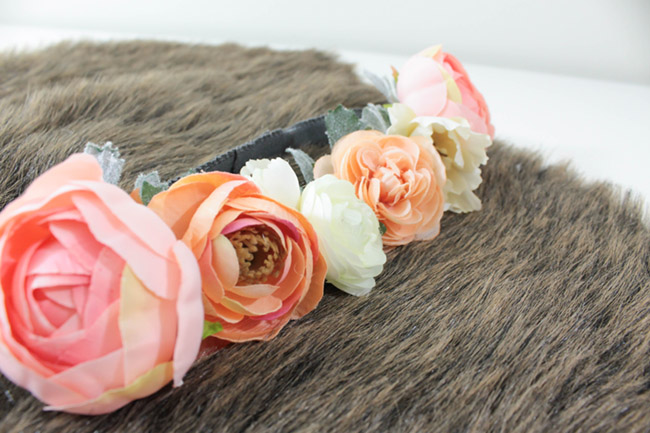
Step 1: Follow steps 1-3 from the first headband, but grab your gray ruffle elastic for this headband. It blends in really well with the gray-green leafs we are going to add to it.
Step 2: Grab your favorite bloom and hot glue it to the gray elastic.
Step 3: Snip some leafs from the ranunculus stem. Use 1 to attach to the back of the bloom so that it stays put with the elastic expands and contracts.
Step 4: Continue to hot glue different blooms to the front of the elastic. Securing each one in the back with a ranunculus leaf.
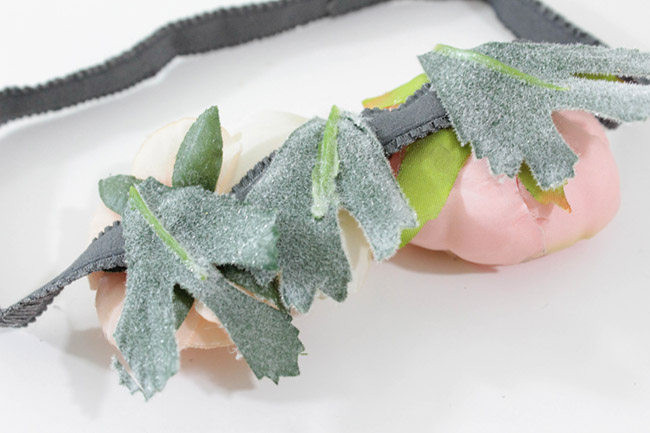
Step 5: Continue to glue blooms until you have about 5 or 6 in the front. These should completely cover the front of the headband so when it sits on a little head, you only see blooms. You can choose to cover the entire thing with blooms if you want to too. The look is, how you envision it! Once the glue is dried, you have a completely beautiful BOHO baby floral crown.
We love giving headbands as gifts to newborns because they are seriously adorable when they wear them. Mom will have fun dressing up the baby for months and months with these 3 completely chic BOHO headbands.
DIY No-Sew BOHO Baby Bibs
Unique baby bibs and baby bandannas are all the range these days! With these 3 lovely fabrics, you can create 3 different, yet all fabulous, baby bib in minutes! If you know me, you know we are not sewera, so all 3 of these bibs are no sew. They could all be converted to sewing if that is what you are into though!
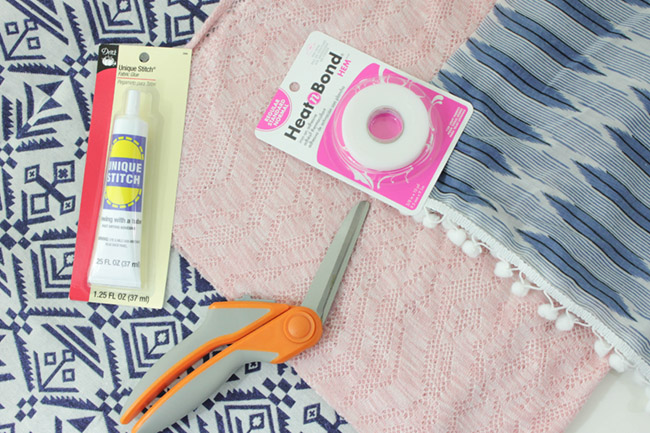
Here is what you need for the bibs:
• Fabric from Jo-Ann Fabric & Craft Stores Earth Child Line
o The three we used were- Aztec Jacquard Navy, Cotton feel with pom poms, and Pink Cozy
• Unique Stitch, stitchless sewing
• OR Heat N Bond
• Fabric Scissors
• Grey/Brown weaved Yarn
• White Feathers
• Faux Suede Fringe
• 1 bloom of Peach Ranunculus
• Glue Gun & Glue
• Sheet of 12 x 12 paper
Pom Pom BOHO Baby Bib


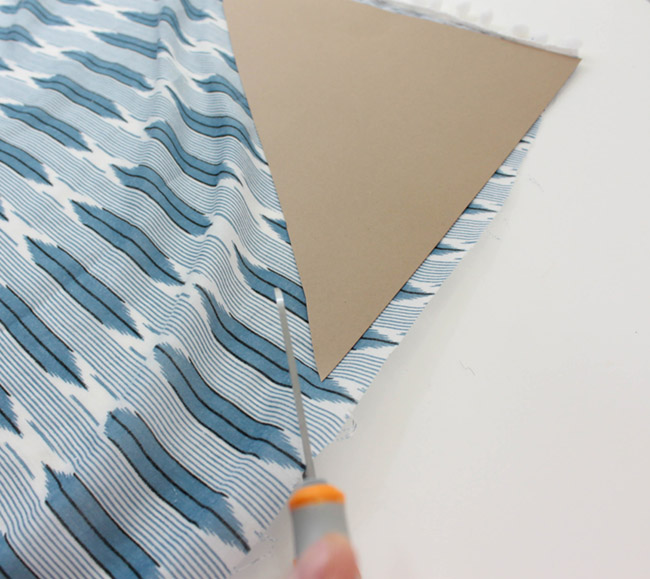
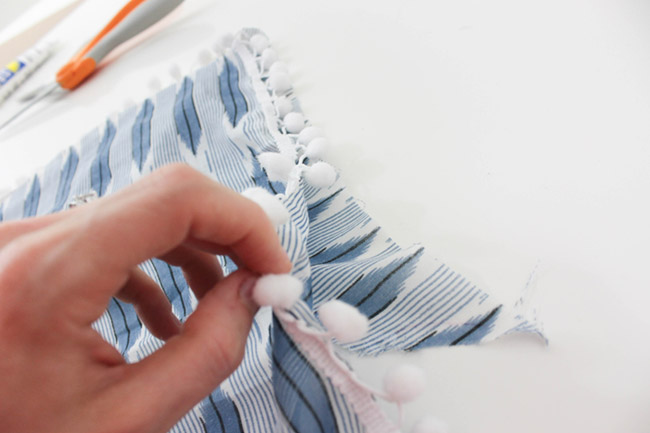
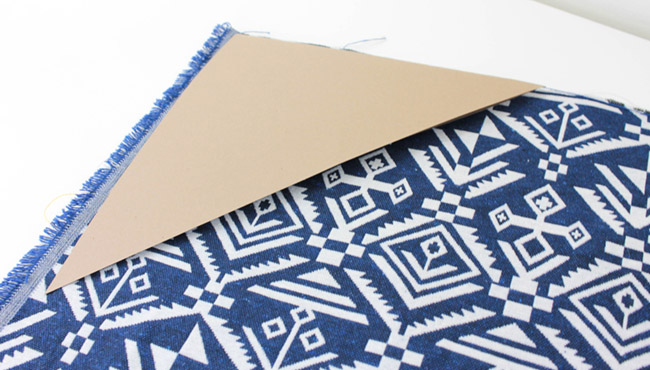
Step 1: Take a 12 x 12 sheet of paper and cut it in half. This will be your template for cutting your bandana.
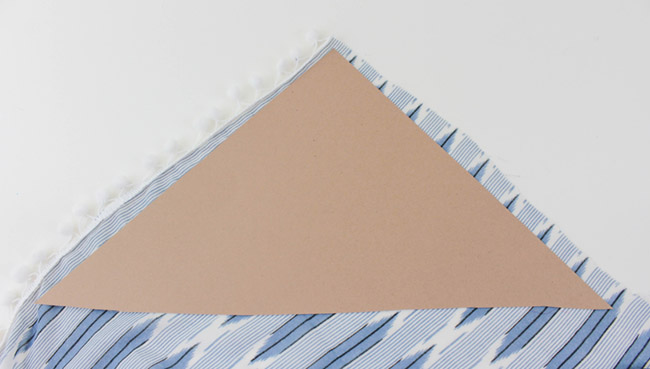

Step 2: Place your paper template at the edge of the cotton pom pom fabric. The pom poms will be on the left side on your first cut. You will cut the other side of the fabric with the pom poms and that 2nd time the pom poms will be on the right.

Step 3: Use unique stitch if you like gluing or heat n bond if you like ironing. Unique stitch takes 30 min- 1 hour to dry so if you are in a hurry, then heat n bond is a better option between the two. You will turn the top edges (not side edges) inward on piece 1, and adhere them with a unique stitch or heat n bond.
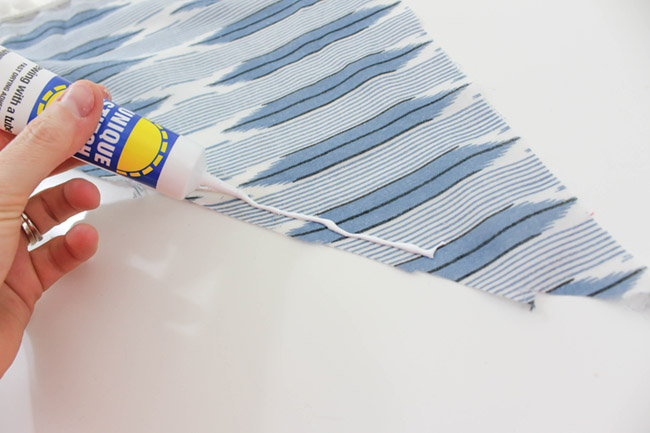
Step 4: Continue the same step with piece 2. Let the glue dry or fabric cool on both pieces.
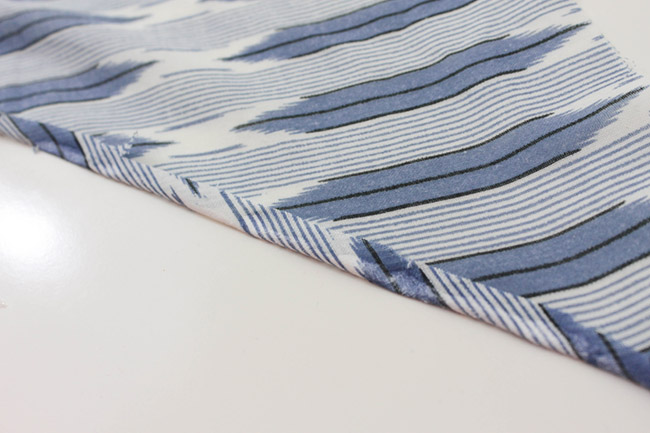
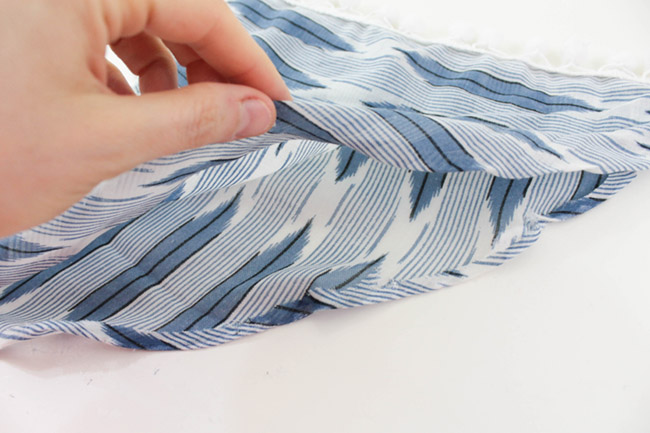
Step 5: Lay pieces on top of each other. Bottom piece should have pom poms toward the left, the top piece should have pom poms on the right.
Step 6: Use hot glue and place small dots/lines of glue on the edging of the bottom piece pom poms border. You will take the top piece tuck it under that border and glue down.
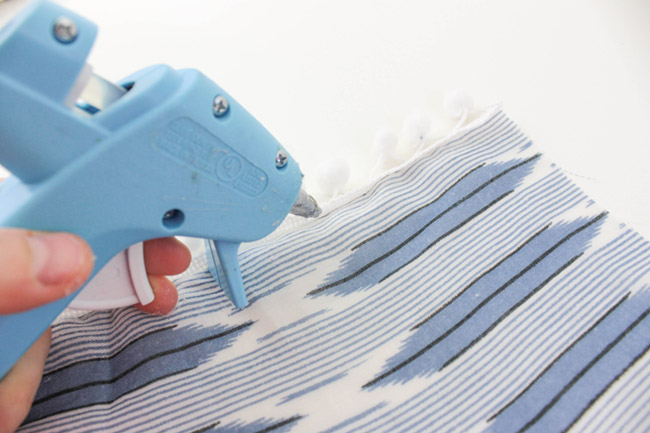
Step 7: Do this on both sides but leave to top open.
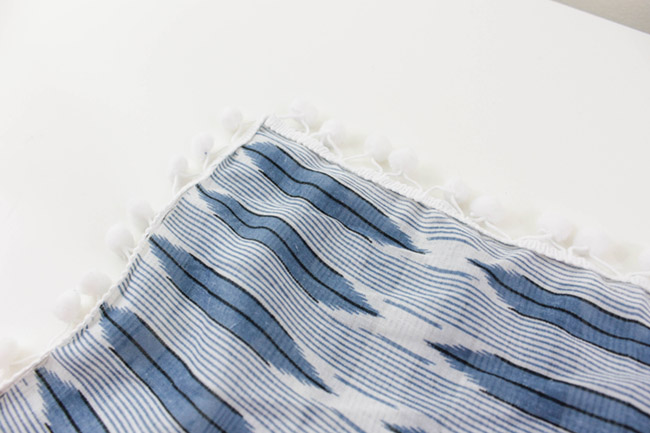
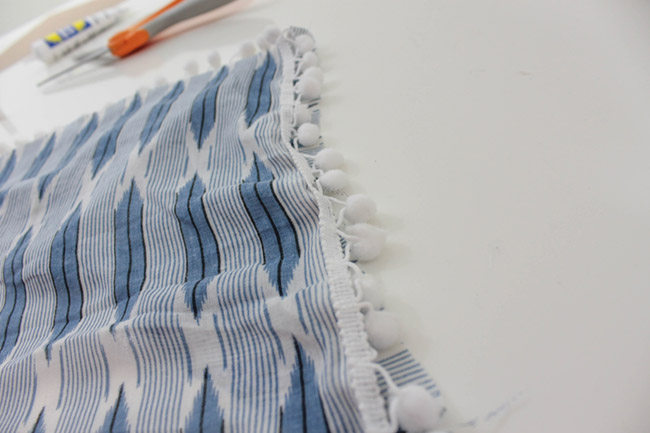
Step 8: Take your top sides with the folded edges and adhere them with a unique stitch or Heat n bond. Be sure to leave a little opening on the left and right corner sides to add yarn as the tie for the bib.
Step 9: Take a bit of hot glue and glue in about 6” of yarn on the left and right corners.
Step 10: Tie a knot at both ends of the yarn to add some dimension to the strings. Tie together with a bow and you have a cute BOHO pom pom bib!
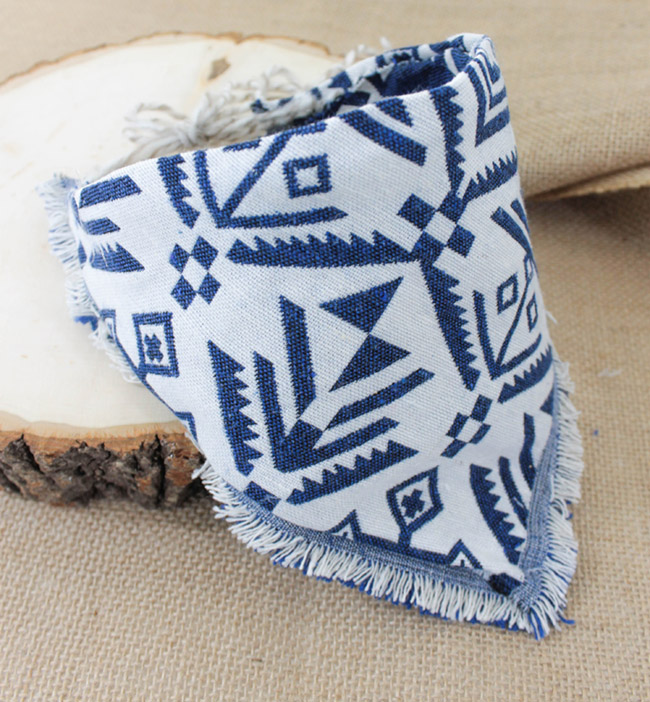
Fringe BOHO Bib

There are so many fun bibs you can make with the Earth Child fabric to create a fantastic BOHO look. This fringe one has our hearts. Made in a similar fashion as the pom pom bib, this no-sew bib is just as simple and quick!
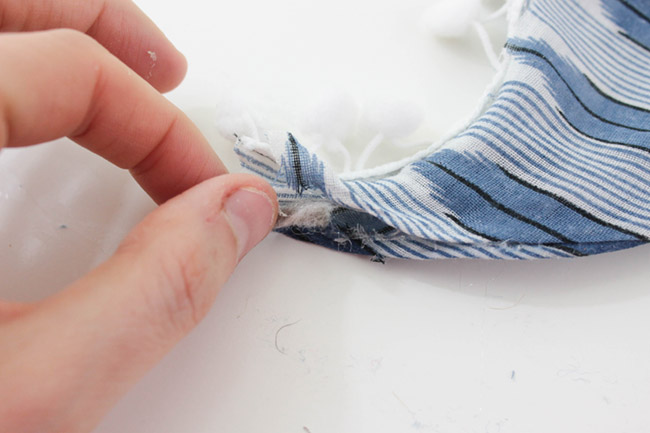
Step 1: Use your template to cut the left side of the fabric with the fringe on it. You will them cut the right side of your fabric with fringe on it as well.

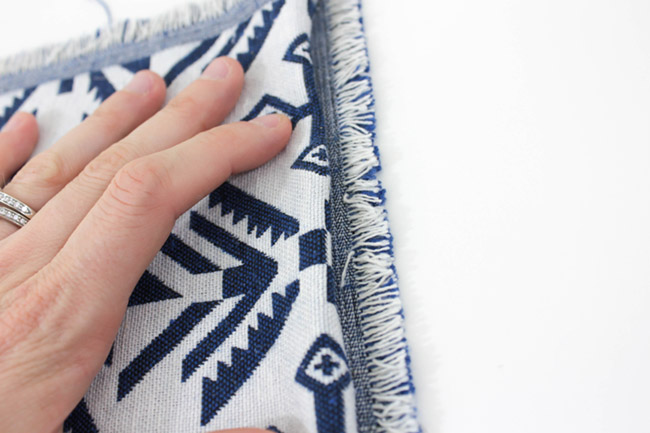
Step 2: Pull away the loose ends from the fabric after you cut it to leave a clean surface and fringe on the sides.
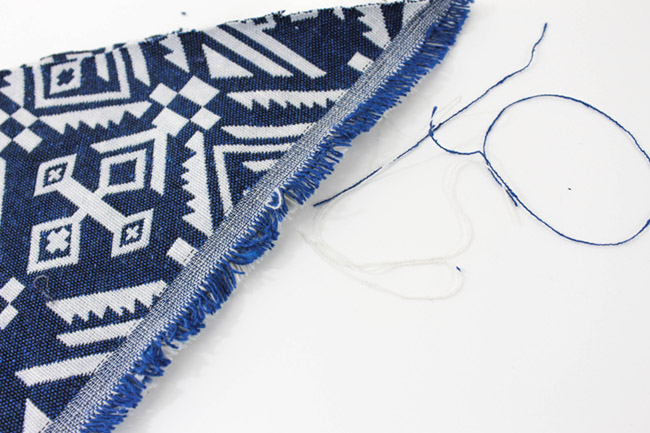
Step 3: Use unique stitch or heat n bond to adhere the edged inward all the sides of the fabric except for the fringe side.
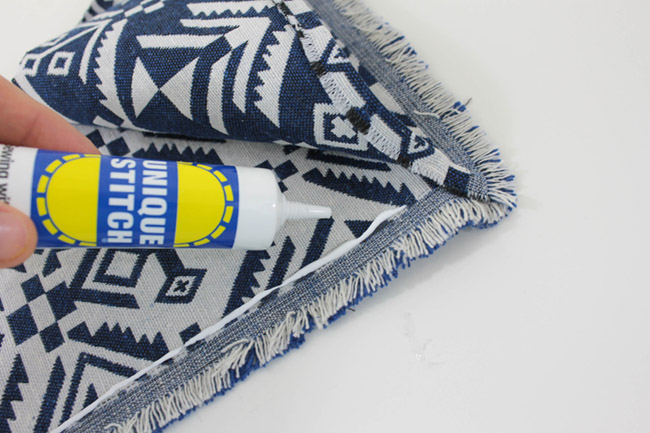
Step 4: Align the fabric where the fringe border is showing on both the left and right sides.
Step 5: Use unique stitch or heat and bond to adhere the two pieces together. Follow the same steps from the pom pom bib for the top part and repeat.
Step 6: Let dry, tie and yarn in the back in a bow and you have another lovely BOHO baby bib or a baby bandanna!

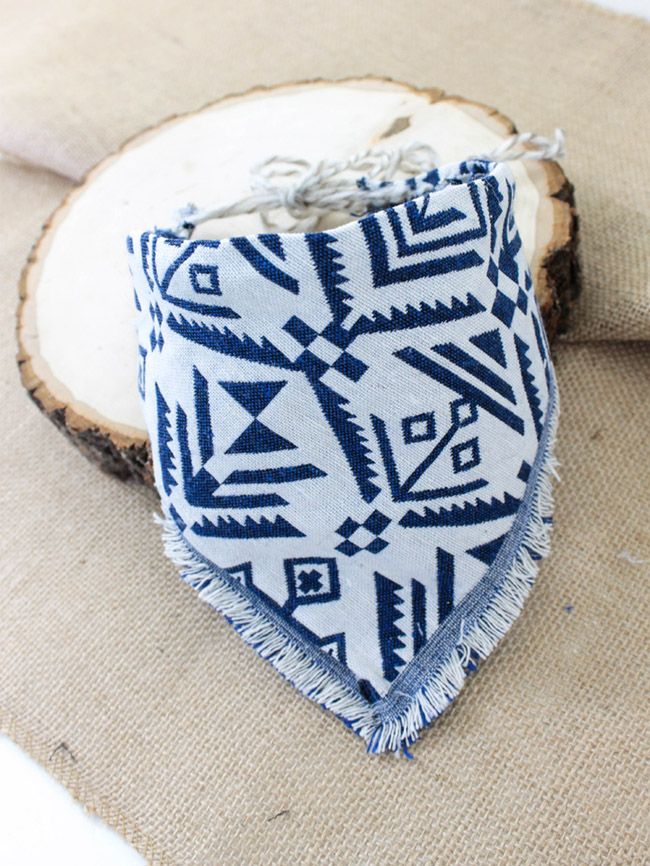
Pink And Suede Fringe BOHO Baby Bib
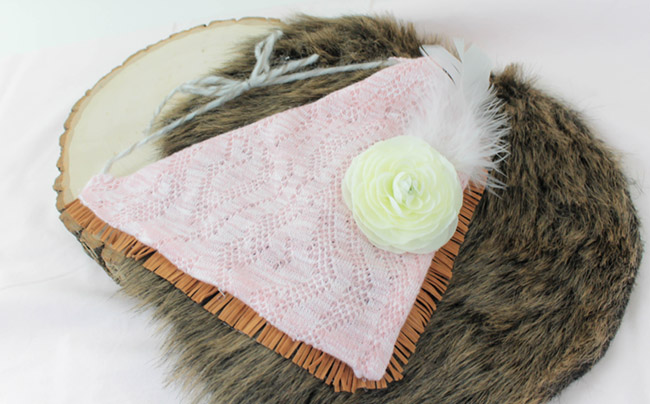

This bib is made very similarly to the top two, but it has some added flair to it like suede fringe and a bloom to make it unique. Here is how to make this cutie!
Step 1: Take your template and cut 2 pieces from the pink cozy fabric.
Step 2: Glue in all side edges inward on both pieces with unique stitch or heat n bond.

Step 3: Face both pieces together with edges facing each other and bond them together with a unique stitch or heat n bond. Finish the top of this bib just like the others. Don’t forget to leave a little gap for the yarn on both corners, so your bib has a tie.
Step 4: Now time for some details! Hot glue the fringe to the back bottom of the bib on the left and right back of the bib.

Step 5: Take a small feather from the pack and hot glue it to the front of the bib. The bottom right of the bib is a good place for it and just low enough so it isn’t sticking up at the top.
Step 6: Take one of your blooms and add some hot glue to the back of it. Add this on top of the feather on the front.
Step 7: Let the glue dry and make sure things are held in place securely. Once everything is dried, you have a beautiful pink with brown fringe BOHO bib!
All the bibs are so cute. They totally work for bandanas too. Meant more for clothing than function, these bibs are the cutest accessory for the new little one.
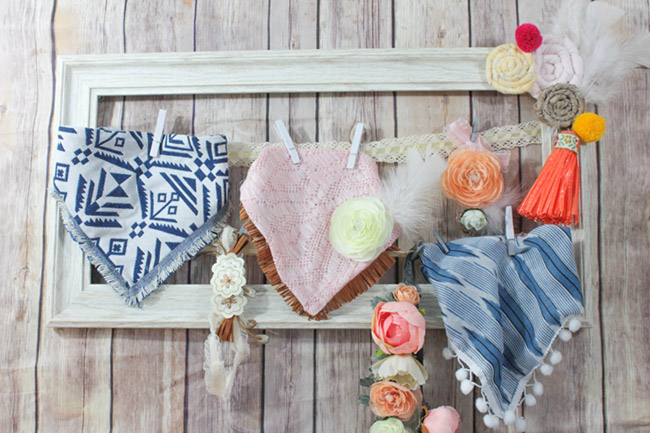
With all those accessories, the baby and mom are going to need somewhere to put them. That brings us to my 3rd fun BOHO baby gift, a DIY accessory frame.
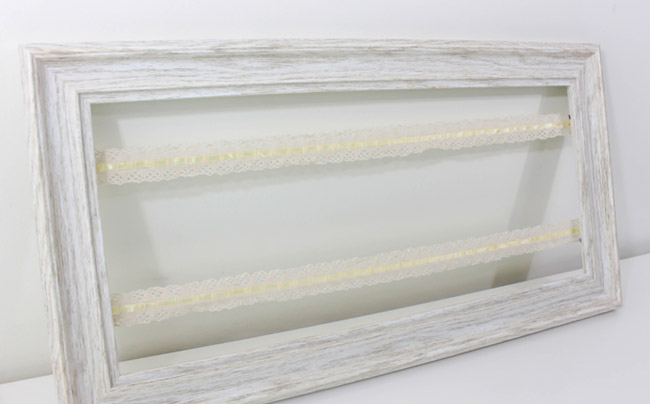
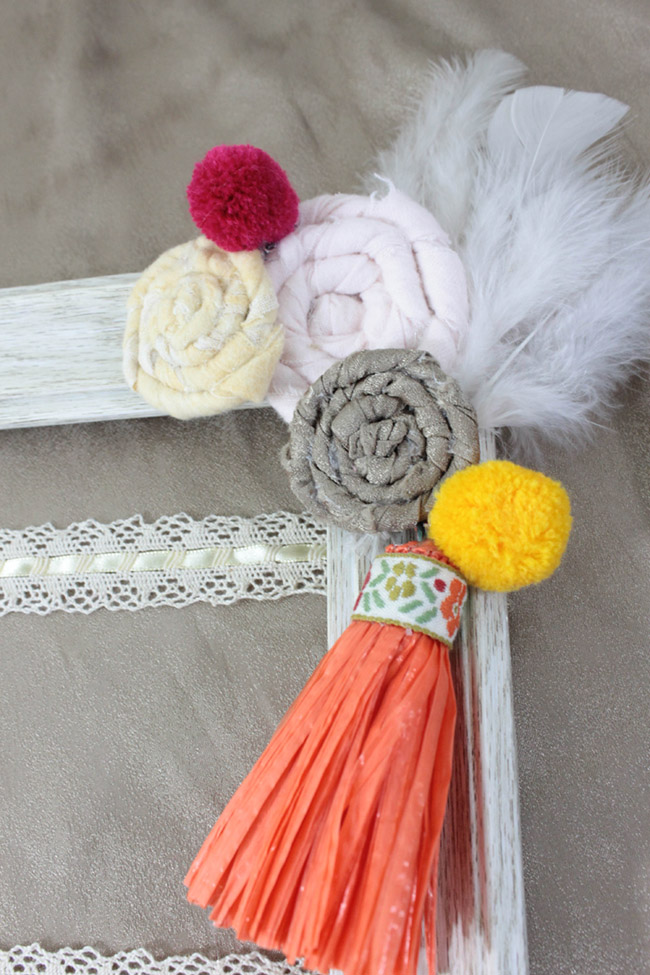
DIY BOHO Baby Accessory Frame
This frame is so easy to make, after you see the steps to make it, you’ll be thinking, why didn’t I think of that! You can accessorize it any way you feel too. We have a fun fabric flower DIY to show you as part of this frames accessorizing. Let’s get crafting.
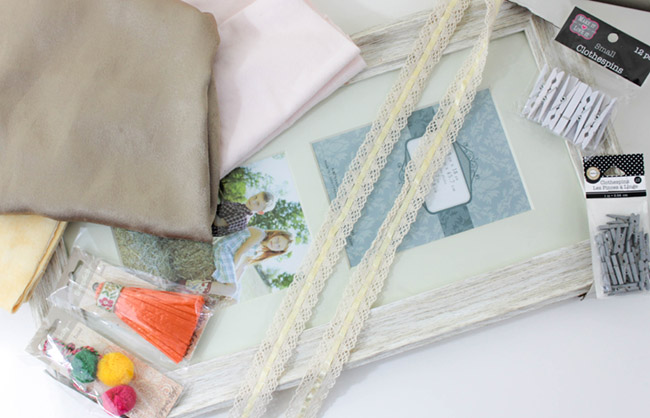
Here is what you need:
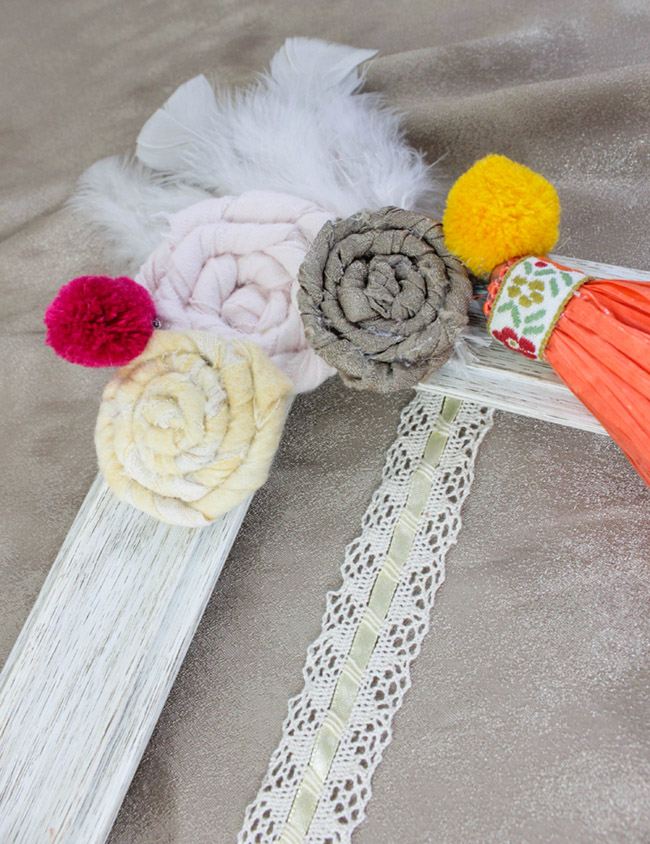
• 20 x 6 distressed wood frame
• 2 yards of Lacy Ribbon
• Glue Gun & Glue
• Raffia Tassel (available in-stores)
• Pom poms
• ½ yard of Flannel in light pink, yellow and tan
• Clothes Pins

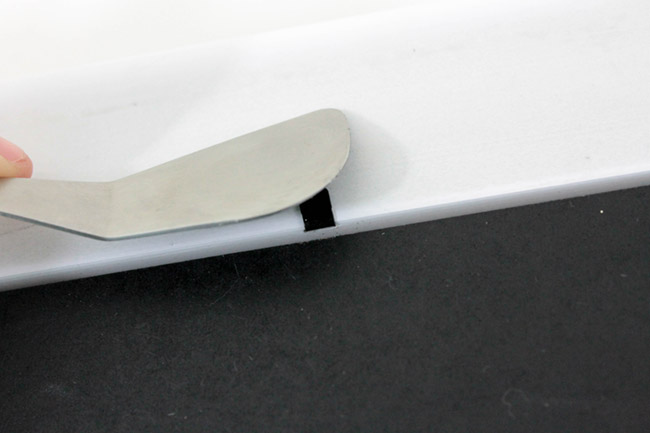
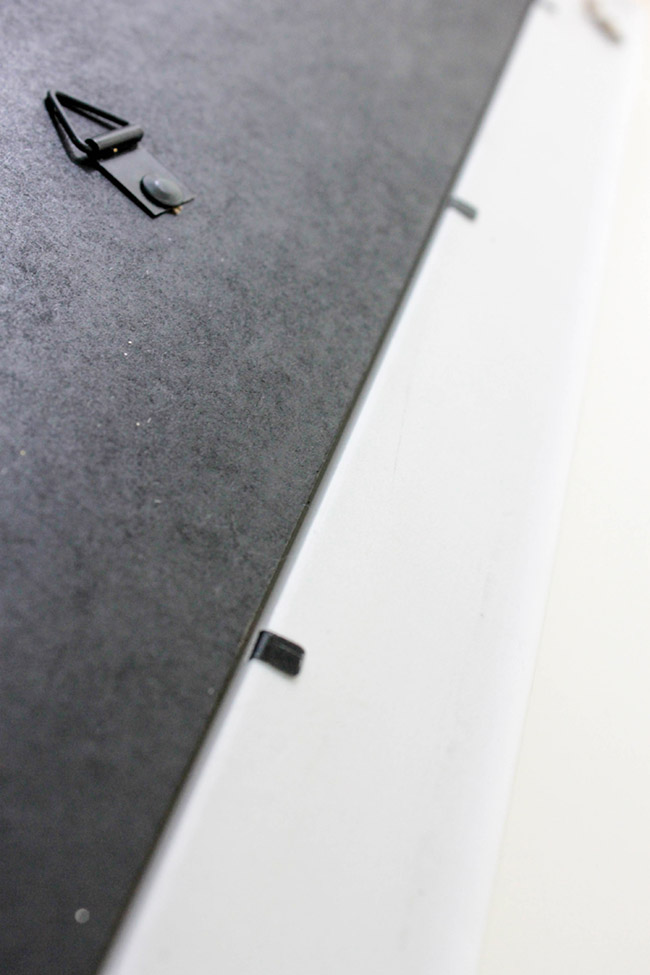
Step 1: Remove the back, glass, and mat of the frame with a flat head screwdriver or anything really that is good at lifting those little metal fasteners.
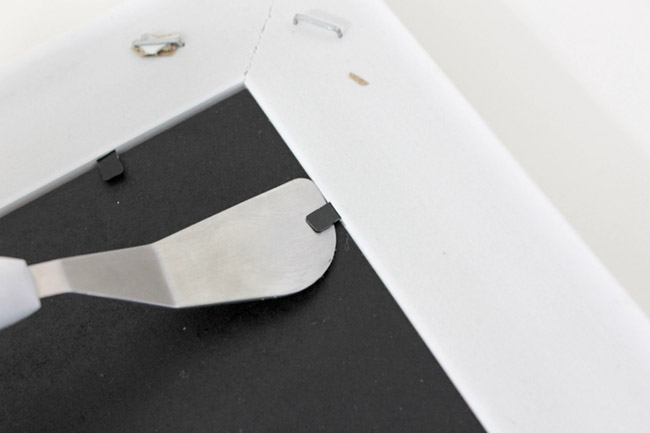
Step 2: Fold the metal fasteners to the outside of the frame so they don’t face the inside.

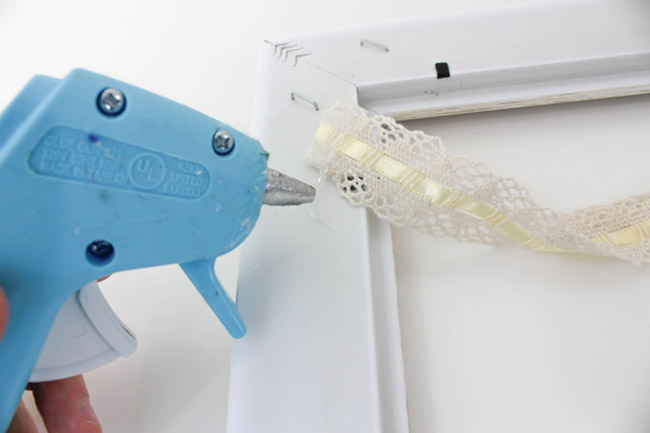
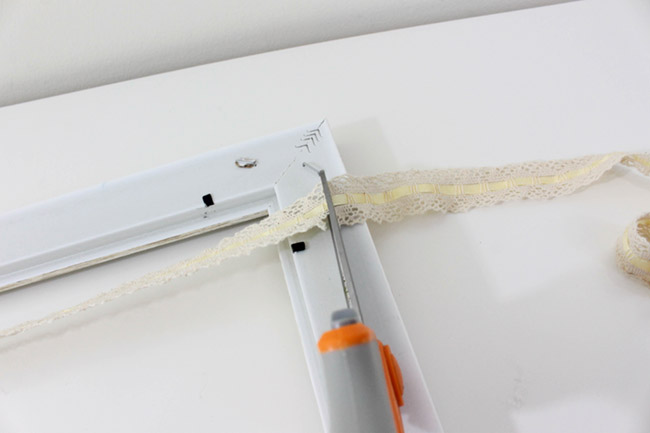
Step 3: Take your hot glue and glue 2 pieces of the lacy ribbon to the frame horizontally. Place them about 3-4” apart.
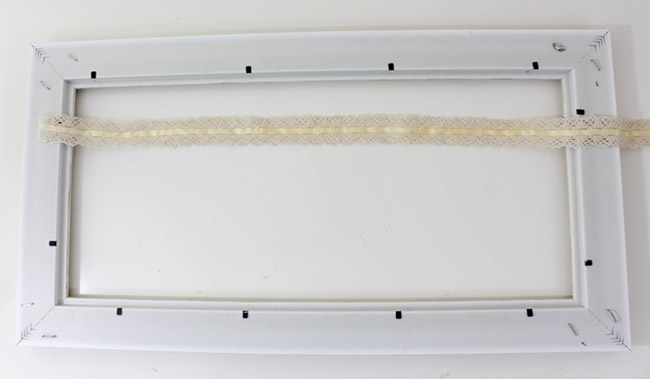

That is really it! You could give this accessory frame just as it is, or you could spruce it up a bit. Up to you! We wanted to spruce mine up with some fabric flowers and some tassels. It looks great as is though too!
To make this frame, even more BOHO, add some fabric flowers, tassels and pom poms to them.
Not sure how to make fabric flowers? They are easy! Here is my No-Sew DIY Fabric Flower tutorial that never fails.
DIY Fabric Flowers
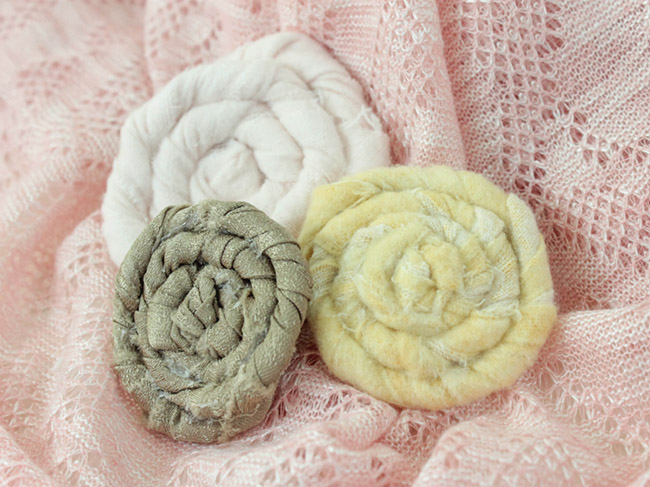

What you’ll need:
- Fabric– at least 1/2 yard or more. You can use as many different colors and patterns that suits your project.
- Glue & Glue Gun
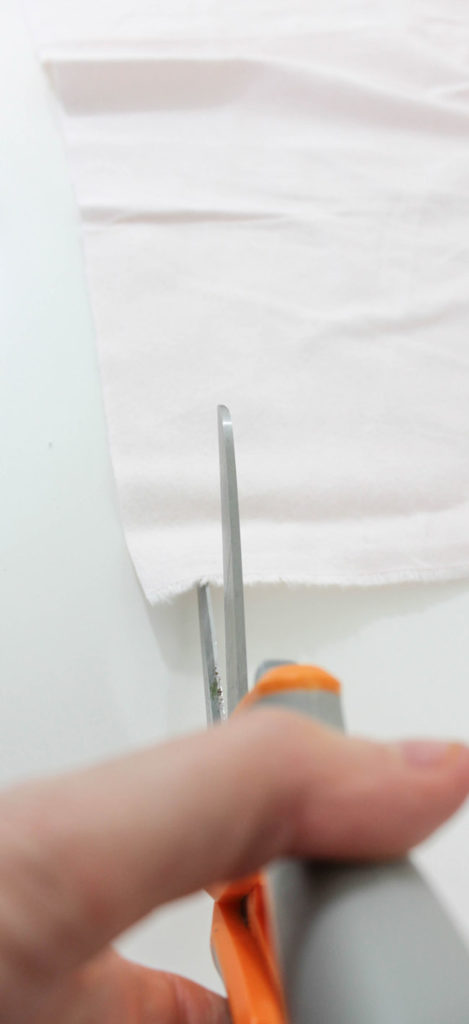
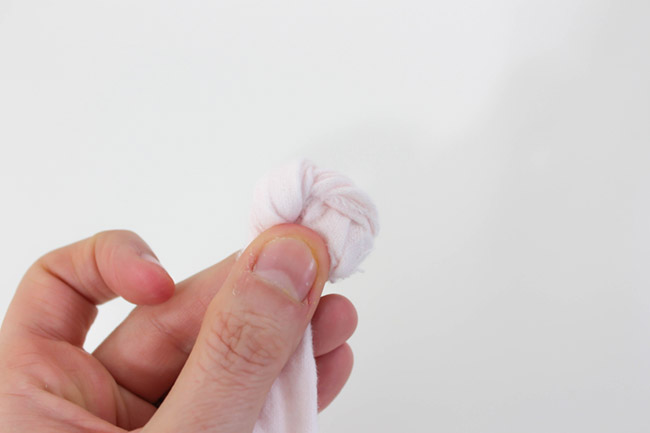
Step 1: Lay out your fabric horizontally so you are looking at it the longest way.
Step 2: Cut about a 1-2” slit in the fabric, but don’t cut the whole piece. You are going to tear the piece all the way down the fabric. This adds edges which add dimension to the fabric flowers.

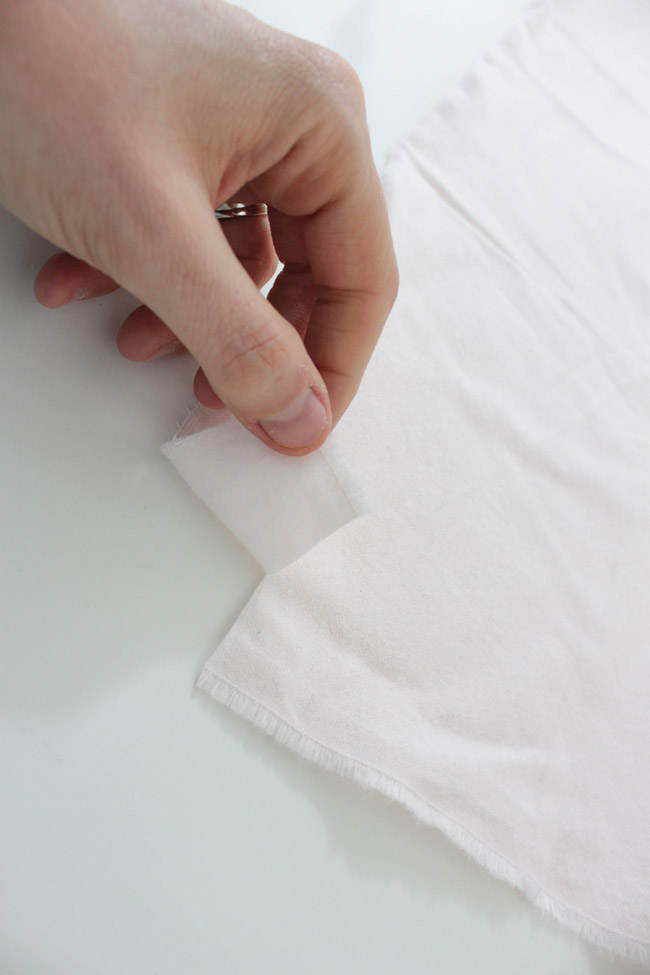
Step 3: Fold the piece in half and then tie a knot where the middle is with the two pieces. You want this knot to be as flat as possible.
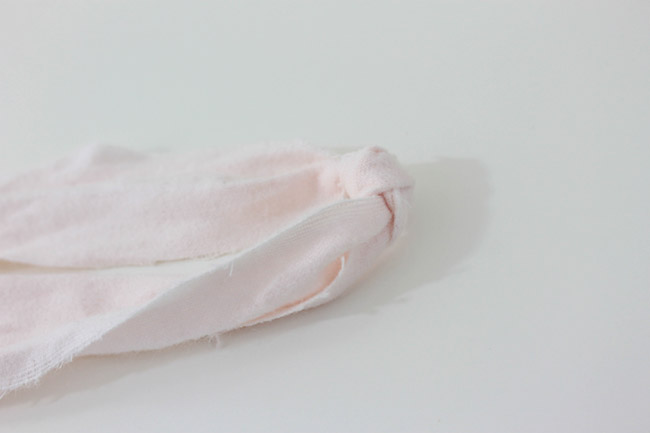
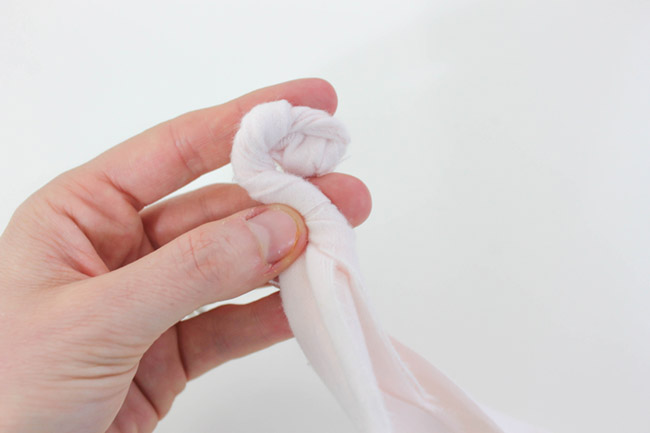
Step 4: Take the middle and start twisting the two ends together. Then start twisting that into a circle. Add hot glue as you go.
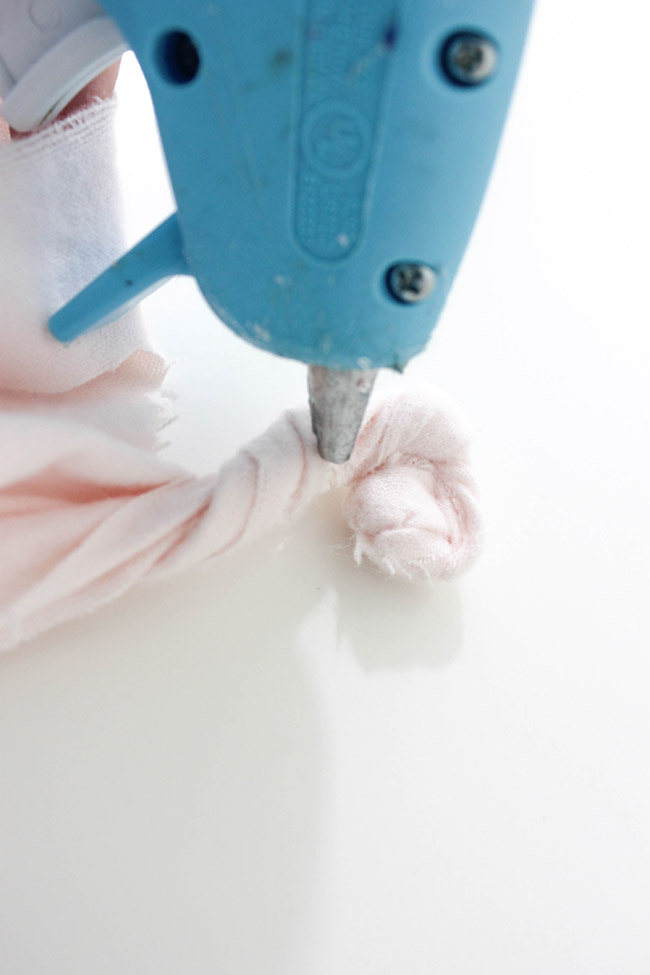
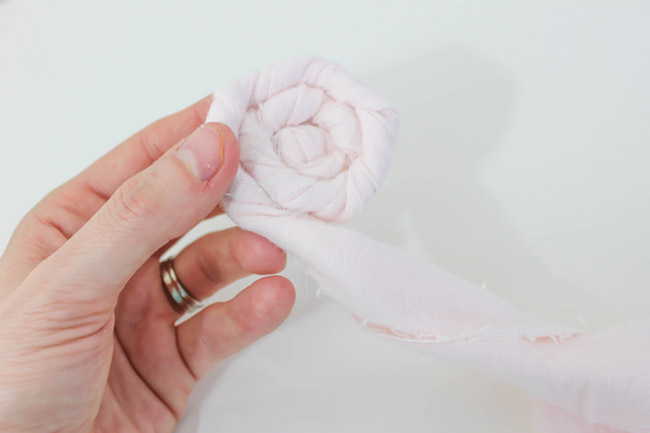
Step 5: Continue to twist and circle until you reach the end of the fabric. Fold the end pieces behind and attach to the back of your fabric rosette that you have now.
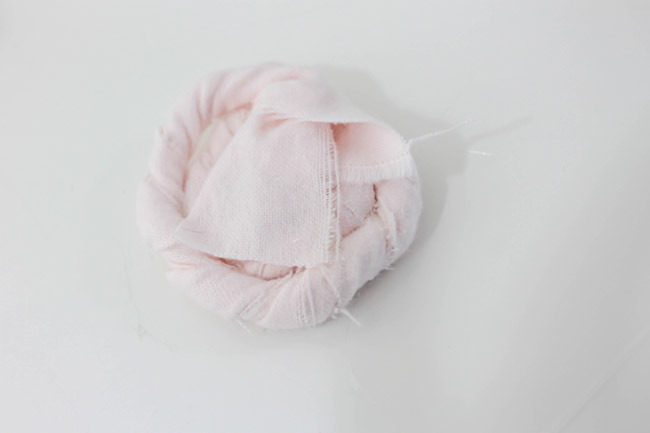
Now you have a fabric flower you can put on almost anything! Continue this with the different colors and change up the length of your fabric so you can get all different sizes. It’s a great detail and we love how simple it is.

Hot glue these and other details like tassels and pom poms to complete your accessory frame.
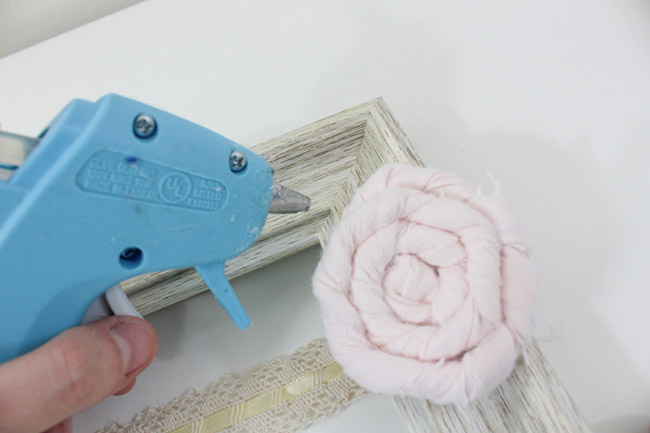
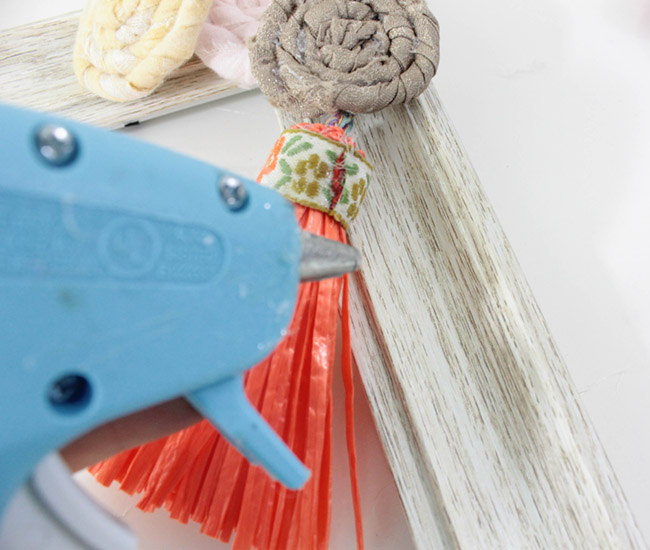

See how much better the frame is now? Beautiful!

Clothes pin all your cute BOHO baby accessories to the frame’s ribbon and you have a perfect BOHO baby gift. Complete will all sorts of cute BOHO accessories like headbands and bibs and an amazing BOHO frame to hold it all.


Happy Crafting Lovelies! Emily- B. Lovely Events