
Lovelies! If you head to Jo-Ann Fabric and Craft Stores, you’ll find that they have a new line of papers that we can’t get enough of. Cricut, now has new paper line that is exclusive at Jo-Ann and they are too cute! There are about a dozen or so new series of papers that you can use with your Cricut machine. You can do just about anything with these papers and they come in a variety of styles to fit your crafting needs. There are gold foil ones and silver foil ones. There are designs with ice cream cones and a more summery design with lemons. There is really something for everyone! As you know, the Cricut is a dream to work with and you can cut just about anything with it. With these new papers, the sky’s the limit with what you can do with them! We are going to show you how to turn a few of their new papers into a dream catcher mobile. Let us show you how!

DIY Dream Catcher Mobile
Here is what you need:
New Exclusive Cricut papers – Geographic, Whimsical Garden, Woodland, and Neutral Pearl Paper work perfectly for this project.
Let’s Get Crafting!
Step 1
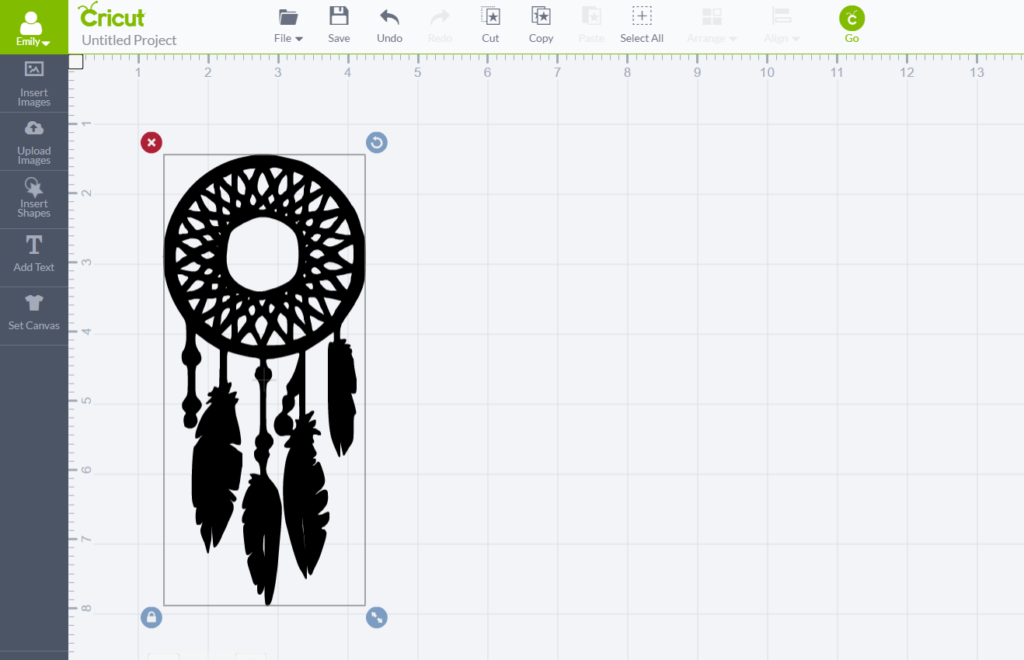
Save this dream catcher silhouette image or insert another lovely one from the Cricut Design Space.


Step 2
If you choose this dream catcher, upload it to Cricut Design Space. Remove all of the white areas with the magic wand, leaving only the outline of the dream catcher.

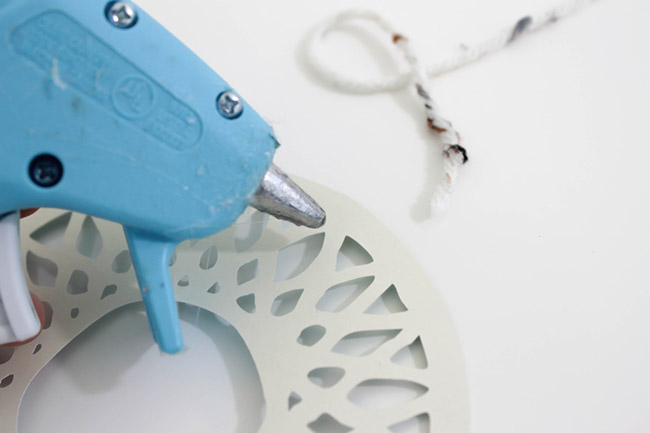
Step 3
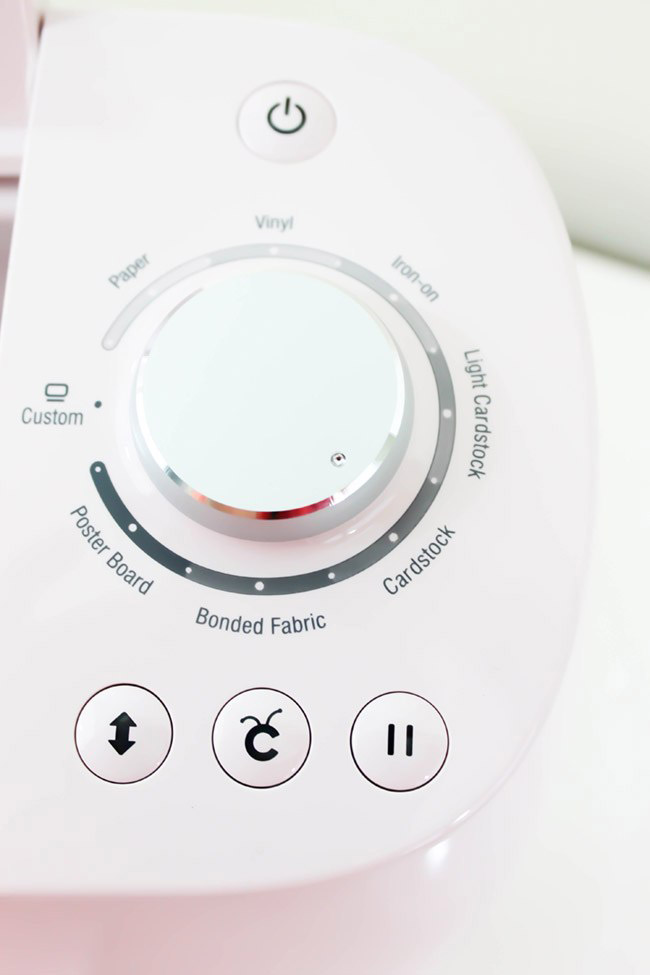
What we love about Cricut is that you can simply just hit go from your design space and it starts cutting right away! First add your 12X12 Cricut paper to your standard mat, and hit the load button. Turn the dial to cardstock. Click go in the Cricut Design Space. It will take you to a screen where you double check your cut and click go again. On that screen, select your Cricut machine from the drop down menu.
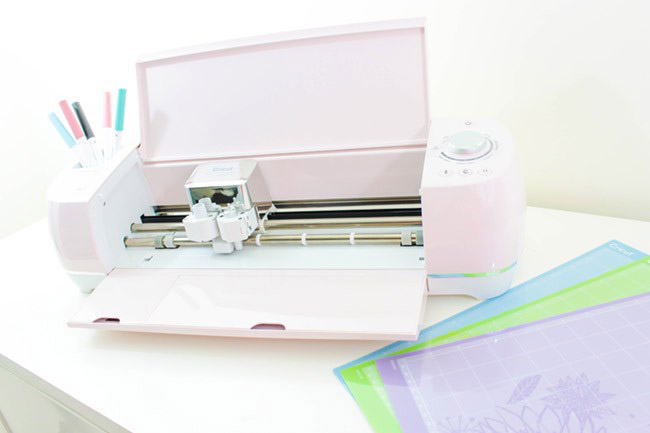

With the Cricut Air 2, it cuts twice as fast, which is amazing! Click the 2X box and then you are good to go! Hit the blinking Cricut button and watch it work its magic.
Step 4
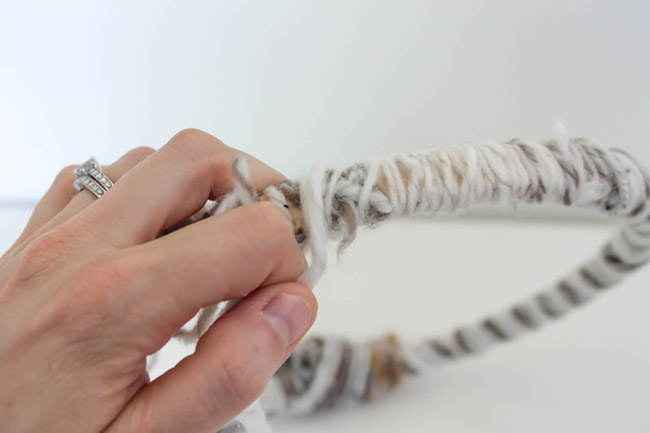
While the dream catcher is being cut, get out your wooden embrodery hoop, yarn and glue gun. Attach 1 end of the yarn to the hoop with hot glue and start wrapping it around the wood. Once you have wrapped the entire hoop, secure the end of the yarn with hot glue.
Step 5
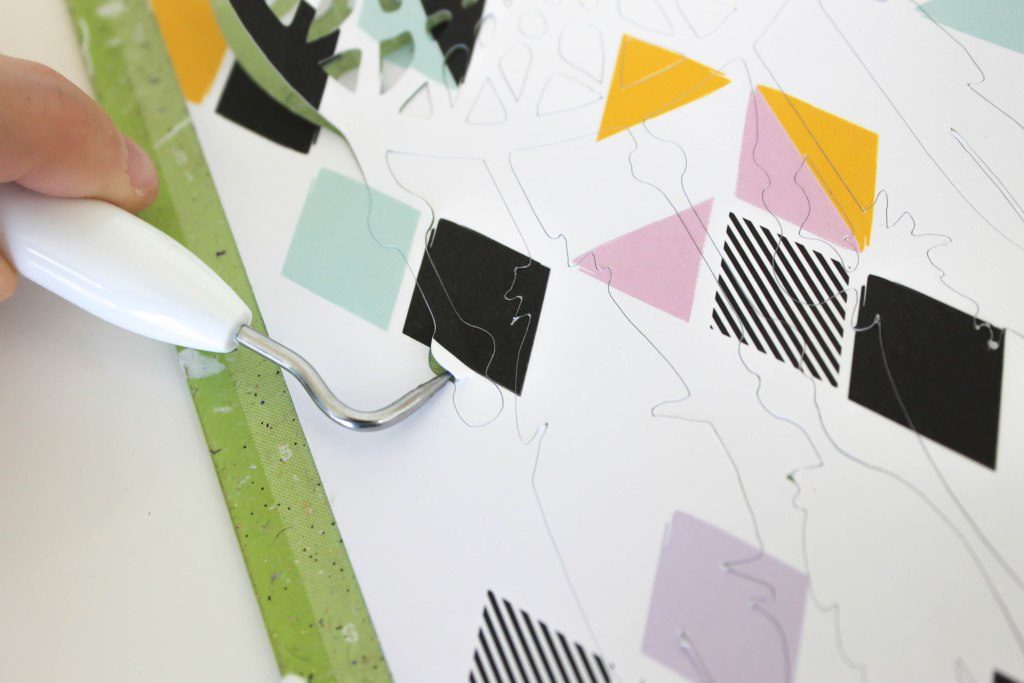
Once the dream catcher is cut, take your weeding tool and carefully remove the dream catcher from the mat.

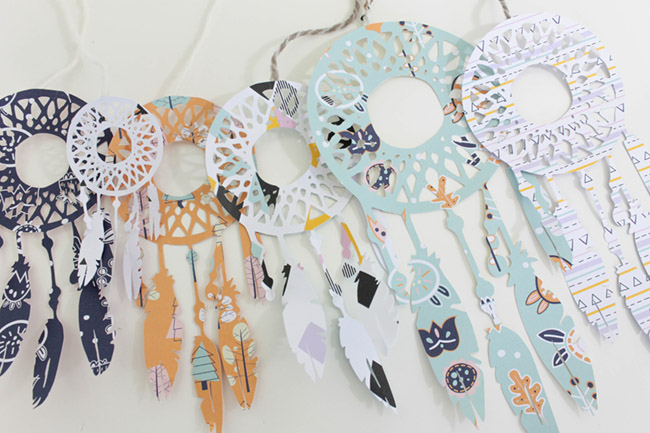
Step 6
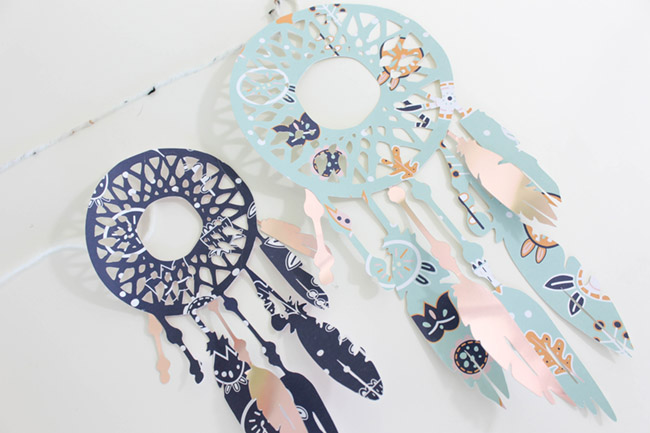
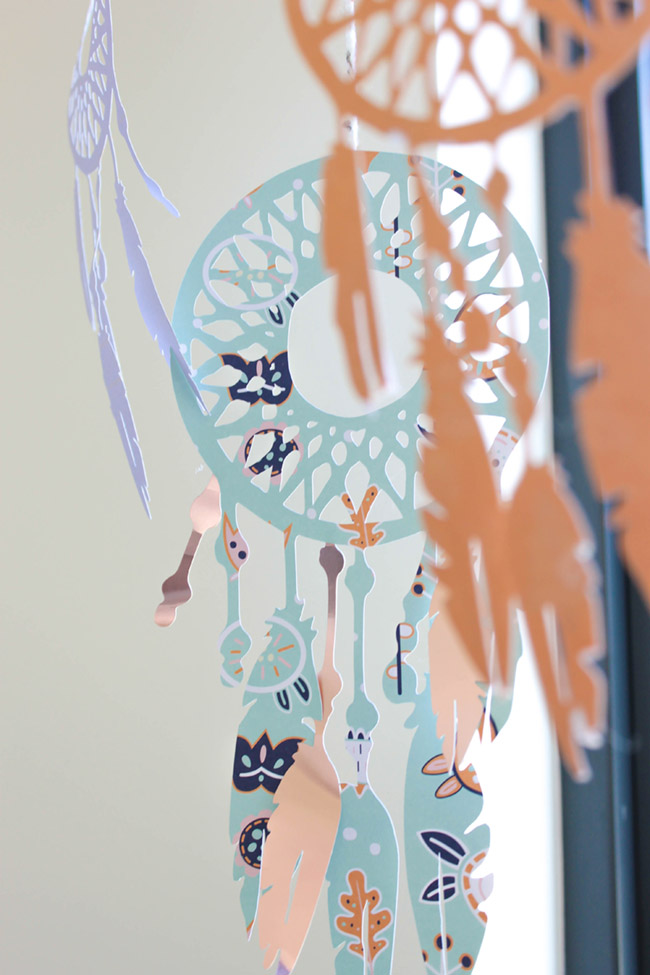
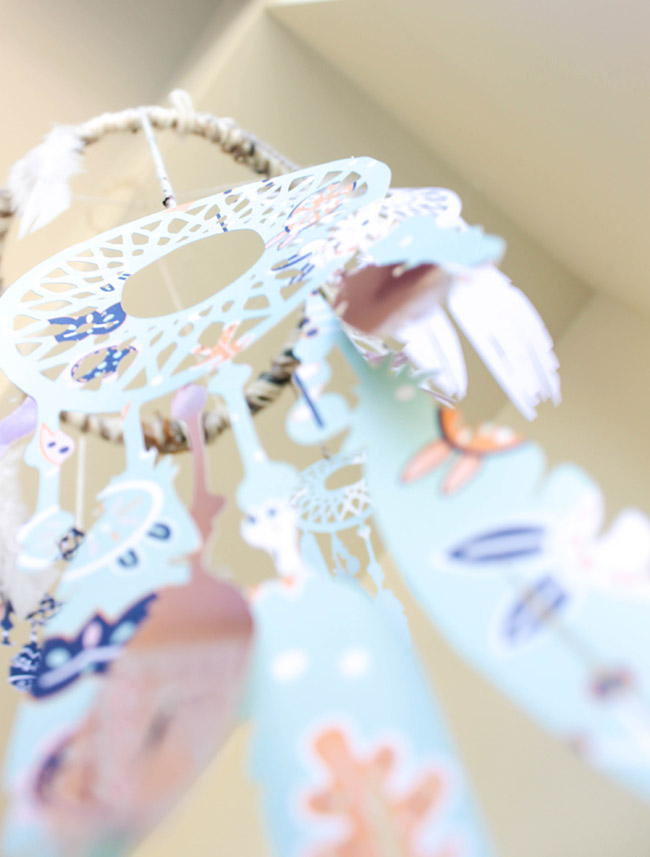
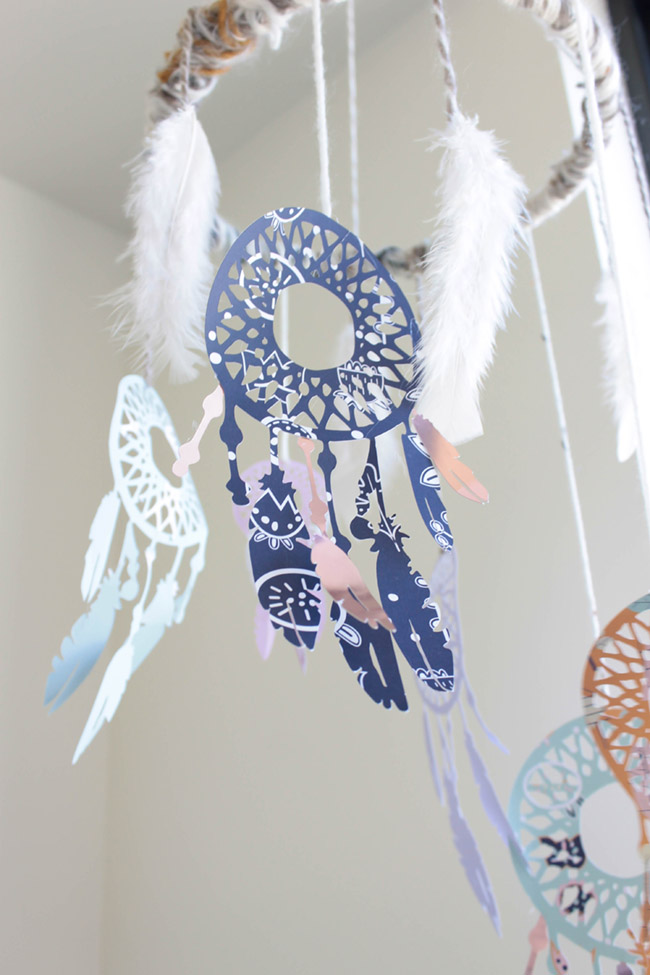
Repeat the cutting step but change up how large your dream catcher each time and change the paper design each time too. 2 dream catchers should be cut out of metallic gold foil to use as assents later in the project.
Step 7
Once you have a bunch of different dream catchers cut, take about 2’ of yarn for each dream catcher, and secure it to the back of each one at the top.
Step 8
Take the metallic dream catchers that were cut and remove the feather details from them. You will take these and add them to other dream catchers that you cut to add some flair to some of your dream catchers. Simply secure them with hot glue one once you have your perfect spot for them to go.
Step 9
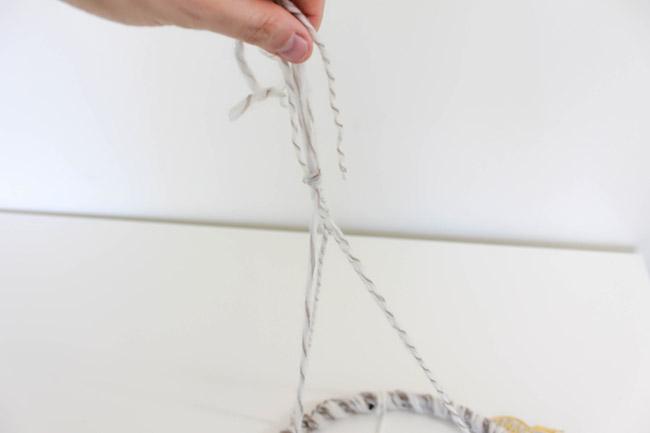
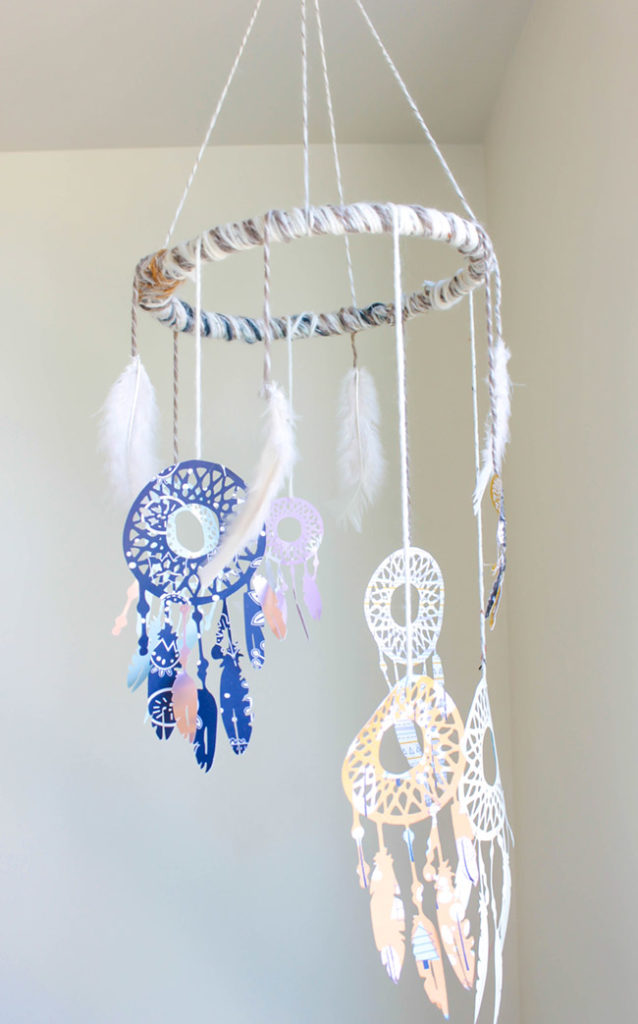
Cut 3 pieces of 2 ½’ of yarn. Tie 1 stand on the top of the hoop. Tie another on the right side of the hoop, and a final one on the left side of the hoop. These should be placed so they make a triangle if you were to draw a line in between them. If fact, once you take all 3 stands and meet them in the middle, they should create a triangle above the hoop. Take all 3 stands and knot them together. This creates the hanging structure for your mobile.
Step 10
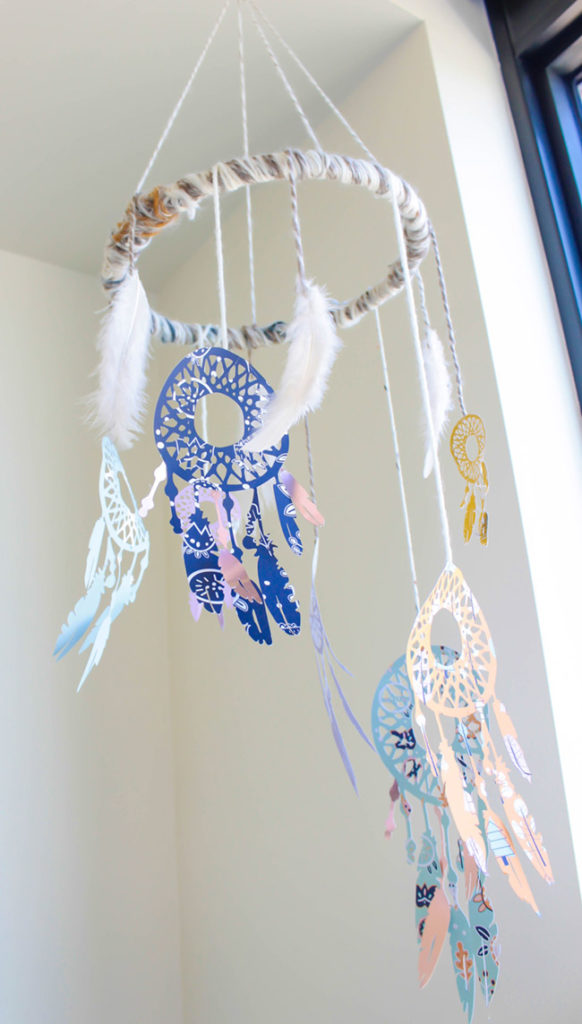
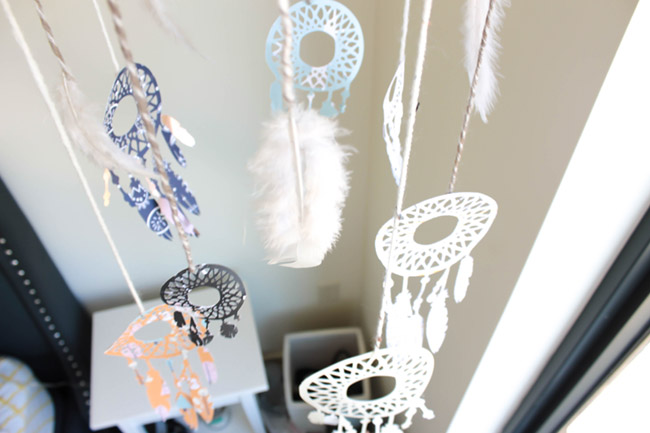
Take your dream catchers with the yarn attached at the top and secure them to different areas of the hoop. It also adds some lovely dimension if you hang them at different heights as well. Tie at the top of the hoop and secure with hot glue.
Step 11
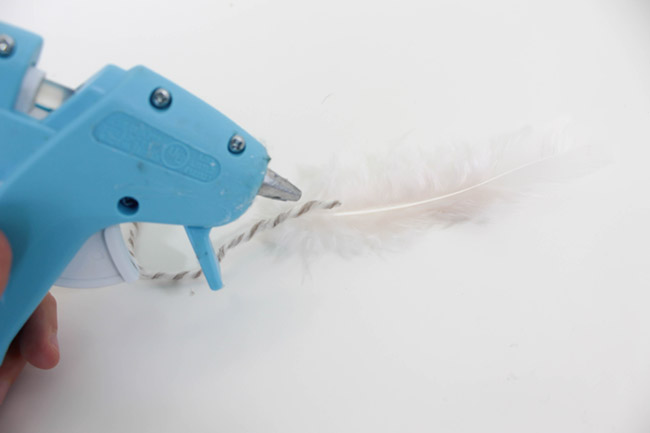
Get out a few feathers(we recommend at least 4) and cut at least 12” of yarn for each one. Secure the yarn to the feather with hot glue. Once dried, tie the end of the yarn with the feathers to the hoop in between the dream catchers. Attach the tied ends with hot glue. The feathers add softness and texture tot eh mobile which we love.
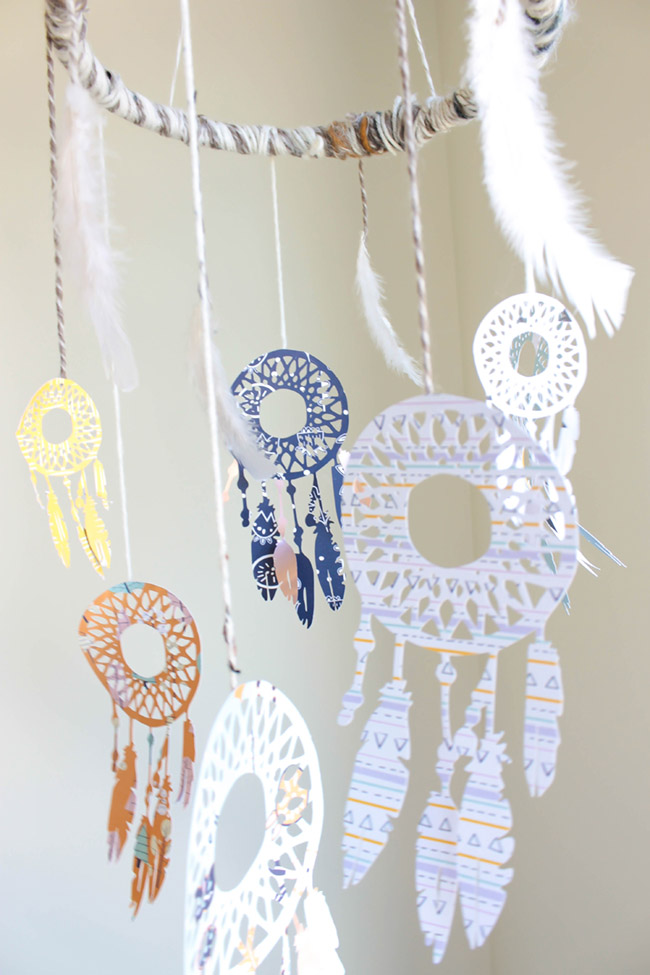
You’re Done!! Simply hang the mobile up in a corner or above a sitting or sleeping area and your dream catcher mobile is ready to catch dreams. We love how charming all of the different paper patterns coordinate on the mobile. The overall look is so darling. It’s a perfect mix of Boho chic that we love.
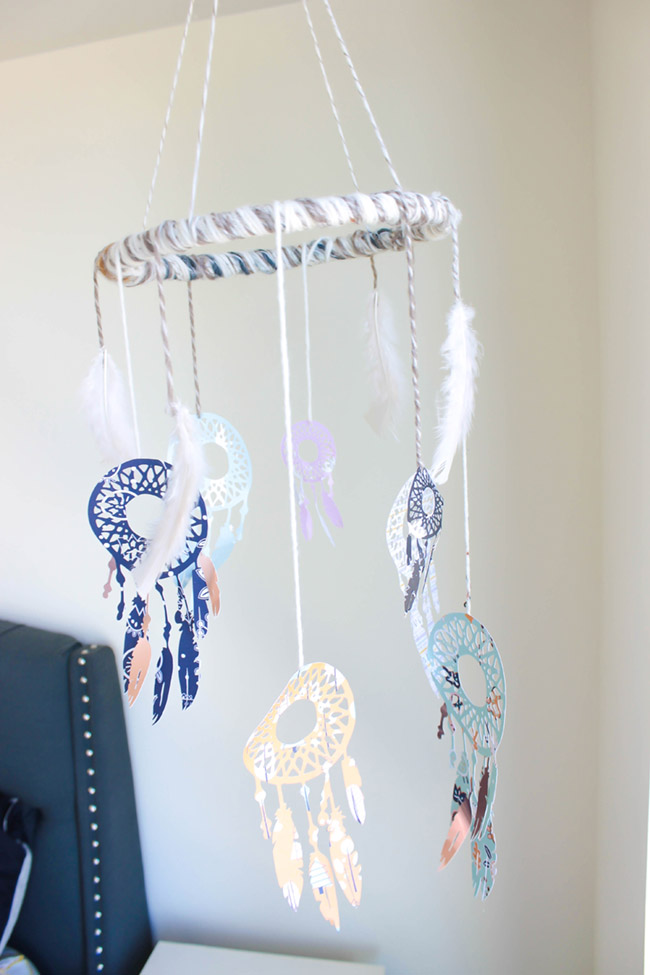


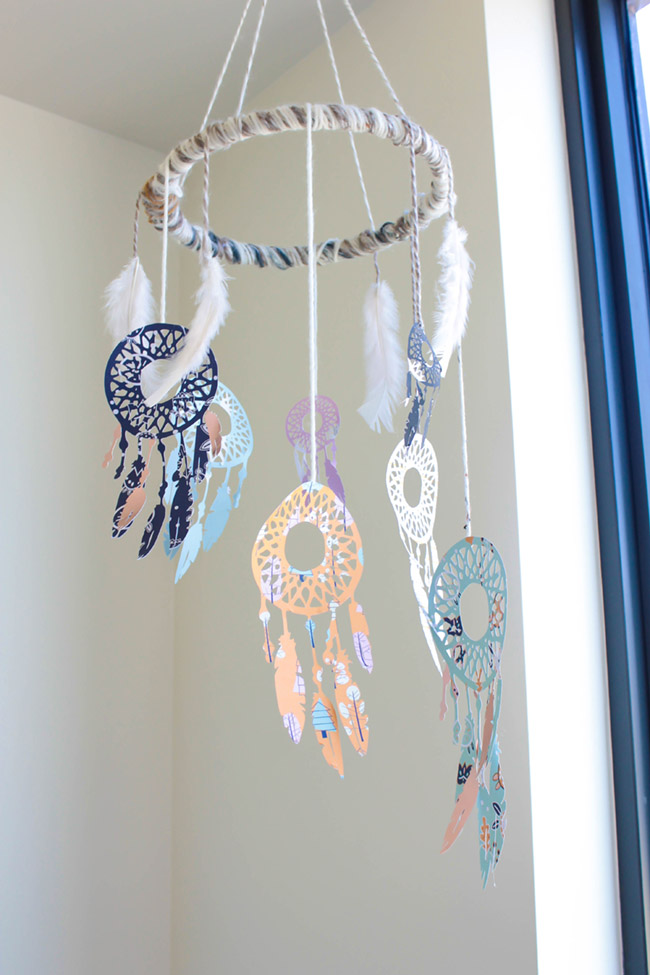

We love when it spins when there is a breeze and the dream catches sway back and forth and the mobile spins around. There is something so calming about it.
Those little gold foil accent feathers are our favorite little addition.
Happy Crafting!